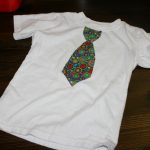
Looks like the car cosie you say? Ohhhhhh scroll down my friend.
When I gave Wesley his car cosie he thought it was pretty cool. However, he looked up at me after a few minutes and said, “Where’s the rest of the road?”. So I thought of making him a playmat, he has mats with roads on them already, but I thought one from me would be neat. Then today I noticed he had all construction vehicles parked on his cosie and thought I’d make him a construction site playmat instead. I even have the perfect fabric (which is also part of my work in progress car cosie for Nate).
And so once again here I find myself creating from scratch. Not using my grid paper this time, but I will jot down the measurements of what I’m doing and make a template later. BUT I asked myself, why make it just a play mat? what about the vehicles? does he have to carry his car cosie as well? So I had the idea to incorporate the car cosie pocket idea into a parking lot and then the vehicles are stored easily and the playmat could fold and roll up just like a larger version of the car cosie!! I’m getting pretty brave for a ‘sometime’ sewer. Here’s how I’m doing it.
1. I have a construction themed fabric for the backing (18 x 22, from Walmart’s craft section), black for the road and parking lot, yellow for the lines, green for grass, brown for the dirt and a patterned stone print for here and there. I may have to break out the Steam a Seam again for the appliqué, we’ll see.
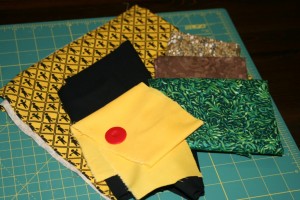
Fabric selection
2. I cut a piece of black fabric to be the pocket (10 x 22), fold in half and iron. I sewed it to piece of black fabric to be a road in front of the parking spaces ( 8 x 22, just because). I suppose you could just cut this all as one piece and press twice to be pockets and a road but I wasn’t being that logical. Attach the pocket piece to the road piece by sewing along the raw edges.
3. Pin it at about 3 inch intervals, leaving 1/4 for seams. This 3 inch part was a bit ‘ishy’, I eyeballed it after I didn’t like the 3 inch spaces. Sew along those lines over the edge of the fold a little bit. One tutorial I read said to be sure to backstitch as those pockets are going to get a lot of use from little hands.Then I got out my new love, Steam a Seam and cut out little yellow lines which I ironed on over the pocket stitching. I recommend not sliding the iron around the fabric but rather use a lift and press technique as those little yellow lines might jump onto your iron and get all sticky and messy. Just saying, it could happen.
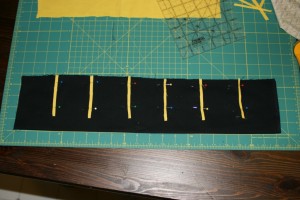
Parking lot in progress
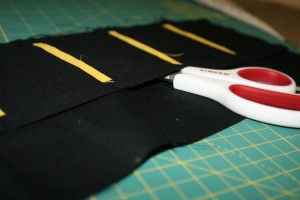
Voila, a pocket.
4. Decide how big you want your construction site. If you attach the pocket piece at the edge of your outside material your mat will be around 18 x 22 inches total. Depending on your needs and the child that might be big enough. OR if you want more play for your buck you can slide the parking lot up a bit, cut a ‘filler’ piece of fabric for the outside, some nice co-ordinating print perhaps and have a bigger mat. I had a scrap of black so I added a couple of inches to mine, making is almost square, 21 1/2 x 22.
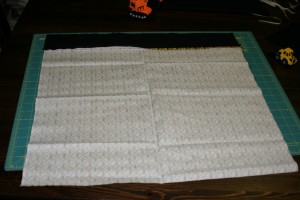
Wrong side with strip I added for more space.
5. Now it’s time to get wild and crazy! I didn’t want to use interfacing but wanted to add some weight to the project, so I cut a piece of white lining to fit the entire area. Then I marked off where my pocket/road section would end. Then it’s time for a bit of freestyling to fill up the construction site! Lots of mud? dirt? a puddle of water? some grass? pile of wood? pilons? whatever! Fill up the remaining space either quilt style or appliqué with scraps or prints picked special for this purpose.
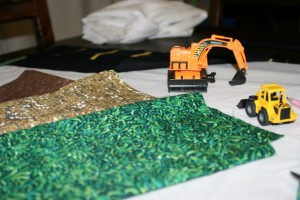
Decisions, decisions.
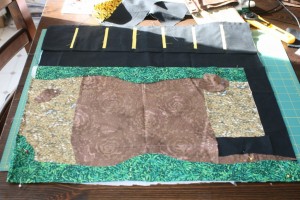
Rough plan (sorry for the sun)
6. Once you have that all worked out sew it to the lining. First I went all around the perimetre with a straight stitch. Then I used a zigzag stitch and just went around everything with black thread. I figured it’s a construction site it can look a bit rough. I also hope it stops fraying and secures the pieces down from my 2 little munchkins.
Look close for zig zags. Wesley was waiting at the machine and ran off with this to play. So no detail picture.
7. Now we got my trusty friend Steam a Seam out again and placed some mud puddles here and there. This part was fun because Wesley could help me do it and it can hide any stitching or spaces you just don’t want anyone to see.
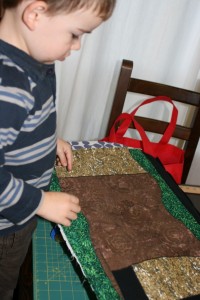
Wesley wanted to put them all in the big mud area in the middle. I stifled his creativity and moved them around a bit to where I wanted them.
8. Now put things right side together, sew all around, remember to place an elastic for the button and leave an opening to turn. I put the elastic loop in and sewed all around leaving the space across from the loop open to turn. Then I came upstairs and put some cars and trucks into the parking spots, rolled it up and got a feel for where a button should go. Then I reached into the hole and attached the button.
10. Time for some top stitching fun!! Turn the project right side out and press to get a nice crisp fold. Top stitch all around the edges of the project. If you’re a quilter you can even get fancy and do some stitching around the playmat (not on the parking lot!).
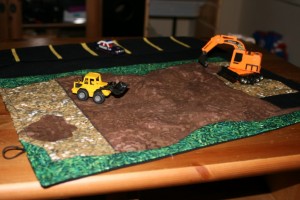
I'm sure I have these all set up wrong, Wesley will fix it in the morning.
11. Ta da!
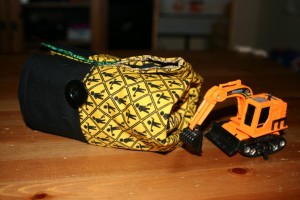
All rolled up and ready to go!
Things I learned:
– I should make my patterns and do my thinking during the day so I just have to follow steps at night when the kids are in bed and I try to sew.
– Lots of black scraps, left over from mistakes, isn’t so bad. It can be parking lots on some other playmat.
– Having yellow thread on hand would have saved me a step.
– I need a bigger cutting mat.
– Don’t tell your child what you’re doing when making them something cool they will really like. It makes things go slower.


