Tag Archives: DIY

DIY gift tags or mini cards

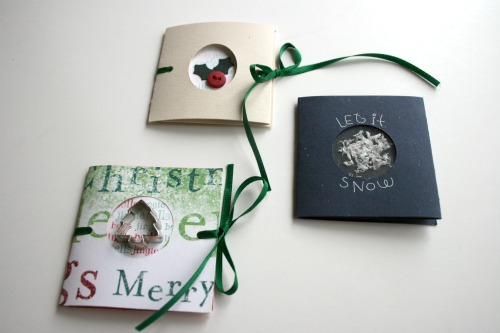
Wow, feels like it’s been forever since I’ve done a DIY so here one is! I’m going to show you how to make these great little gift tags, an easy way and an up-a-notch way. I shared these last week over at Celeste’s blog and now I’m sharing it here! These ones are holiday themed but it would be really easy to change some colours and stickers and use them on birthday gifts or for another occasion.

You will need – cardstock (colours and some white), stapler, paper cutter/scissors, adhesive
Optional fun goodies – ribbon, stamps, stickers, embellishments, ink or markers

Cut the coloured papers in 2 1/2 x 7 1/4 inch strips. The white papers should be 2 1/2 x 5.

Fold the white pieces in half, these will make the inside ‘pages’ of the card.

Fold the coloured paper at 2 1/2 and 5 inches. The remaining section will be slightly less than 2 1/2 inches in width. Using scissors or a punch make a cut out in the middle of the card.

Next grab one of the white scraps and decorate it in some fun way. I chose to use a snowflake stamp and my markers. I used the snowflake to create a patterned paper.

Then place adhesive around the opening for the stamped white piece to stick on. Keep the adhesive over to the one side so it doesn’t peek out later.

Then add some more adhesive on the back of the white paper and fold the last bit over to hide it all.

Place the white piece inside the card and add a staple.

Now turn the card over and add the embellishment on the outside. Voila!

Depending on the supplies you want to get your cards can get really fancypants. The holly one was made with a button and leaves from a scrapbooking punch. The snow flake one has 2 pieces of an overhead sheet with some fake snow stuff I got at the dollar store inside.

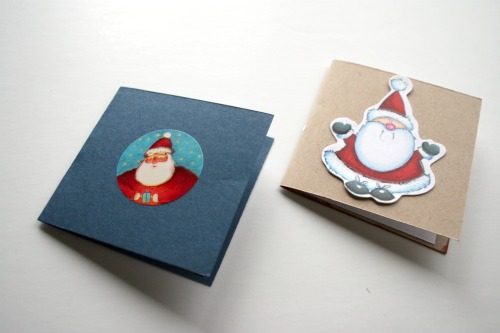
Or you can also just put some stickers or cut outs on the outside.

Camera strap reveal.

Finished my camera strap, once again my sew-a-long project was finished on a Thursday night. Photos taken today, yeah I live on the edge. I’m also a bit of a dork since I put the strap on my camera and it was all pretty then realized it was going to be tricky to take the photos. Yeah, I’m rocking the brain power lately folks.

If you’ve created along with me lbg also has a Flickr group for sharing things made from her tutorials and patterns. I promise her convertible tote will be in this feature some day soon.

I used my new dying of cuteness fabric, had a hard time cutting into it but hey what else is it for? I paired it with some scraps I have kicking around.

I didn’t have fusible fleece so I just used some scrap fleece i had lying around instead. It feels pretty puffy but I’m not sure that’s the way it should be.

Next challenge a boxy pouch! Perhaps you’ve made one of these, perhaps not. I haven’t and I’ve wanted to for a while. Now that I’ve got zippers and flat pouch making down I’m ready for this twist.

I found 2 tutorials that seem like they’ll work, these first two are lined and the first one will be seamless and the other will have seams on the inside (which means no tricky turning), this one isn’t lined at all and might be good for a thicker fabric. So choose your weapon and come play along!

School morning organization help

This post was originally posted over at Meremade as part of her September Back to School posts. My opinion may be biased but it’s a pretty handy idea and so I’m sharing it here.

Now that it’s back to school time things are a little busier in our house. I’m a teacher and with 1 in SK and having to get the kids out the door and over to the sitter I can use some help. This year I work in the mornings and not being a morning person doesn’t help when I have to get 3 people ready and out the door.

I usually lay out all of our clothes the night before and now I’ve come up with a handy little DIY that can help us all do it for the whole school week!

You will need:
Fabric for the tote bodies (you will be cutting 10 8×8 pieces)
Contrasting fabric for cutting the letters (I used a charm pack I had lying around)
Ribbon for the handles
Heat and Bond (really helpful but not necessary)

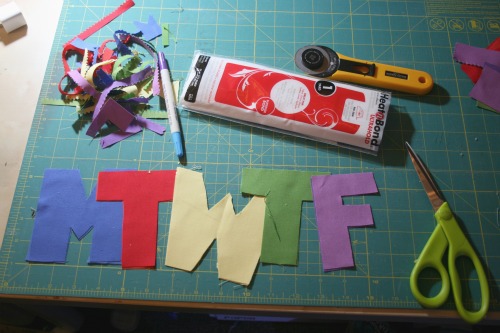
The first step is to cut your letters. I was planning on getting all fancy and cutting mine with my Cricut but I decided to just give it a go and do it by hand. Once I saw the size of my letters I decided that 8×8 would be a good size for the tote bags. I have 2 little boys so I’m only tossing some socks and underwear in there. If you have girls and might be including hair accessories or tights you may want to make your totes a tad bigger.

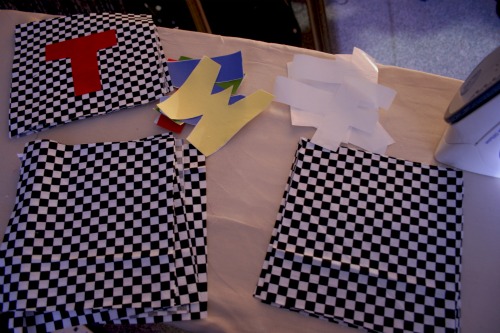
Cut your 8×8 tote pieces, set aside. Cut Heat and Bond as backing for your letters. This product saves a lot of time and allows you to just iron on your letters rather than having to sew them all around. If you like the look of stitching on top you can still do that of course, the Heat and Bond just makes extra sure those letters aren’t fraying or budging!
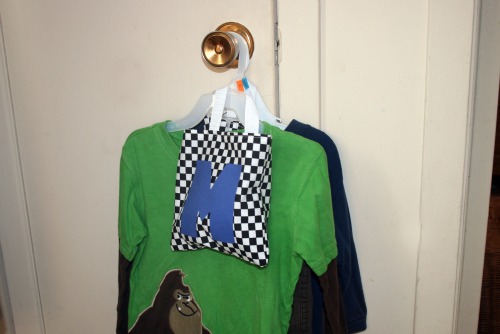
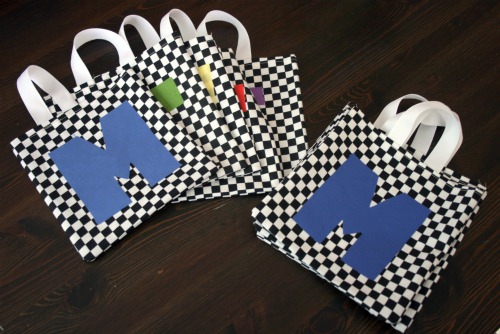
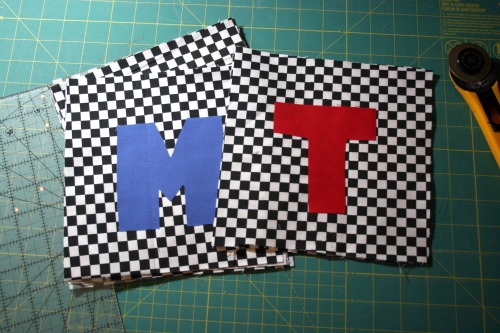
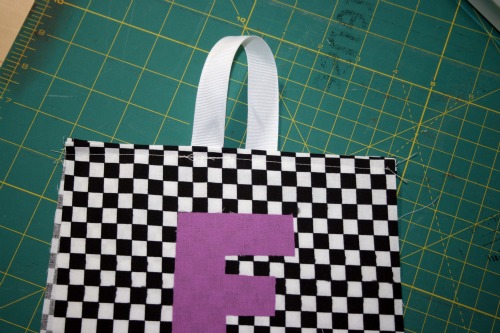
Iron the letters onto the bag tote front pieces. So 5 will get letters, 5 will stay blank.

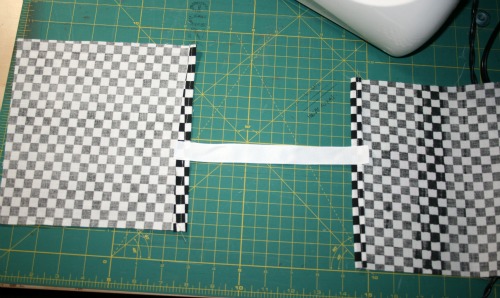
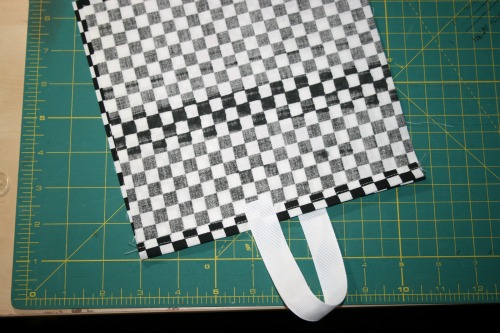
Now you’ve got 10 squares of tote worthy fabric. We need to hem the top edge. So turn the fabric down to make a little hem, I did about 1/2 inch, press and sew.

At this point you could make yourself handles using coordinating fabric but I looked up and my ribbon collection was staring back at me so I choose to go to the easy route. Attach the ribbon slightly off center on the tote pieces. So sew it left of the center line on one piece and right of the center line on the other. If you lay it all out it will look like mine.

So you’ve created a loop to hang over the hanger.

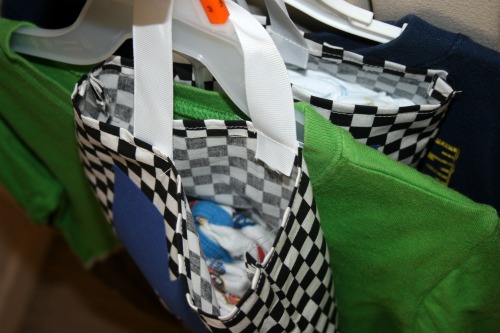
Place the tote pieces right sides together and stitch around the 3 raw edges. And you are done!
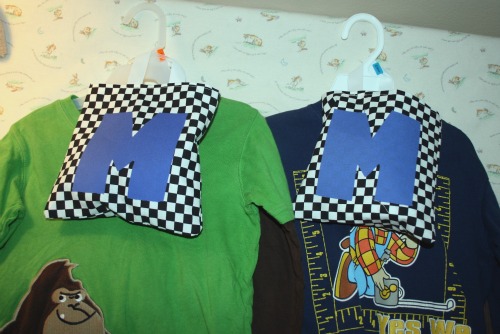
If you happen to have some of those hangers from the store lying around you can use those to hang a top and bottom and then slip a handy little tote with the right day of the week on it over the hanger, fill with needed accessories, in my case socks, underwear and a diaper.

Hang in a handy spot (like on my linen closet door) and you’re ready to go!

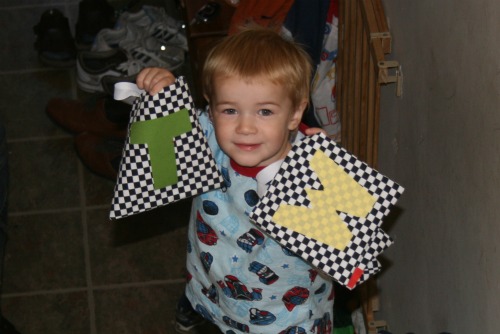
Oh and keep the empty ones in a safe place. This picture is moments after Nate saying ‘Thanks Mom’ and wandering off with the Tuesday-Friday totes.

Eeep! It’s the first day of school.

And with that summer was gone. Imagine a tear slowly running down my cheek.

In more funner news, later this month, the 20th to be exact I’ll be posting a great keeping organized for school tip over at Meremade. Starting tomorrow Jennifer is going to be featuring a load of ideas for back to school crafty fun.

Mine will be awesome, just a heads up. It also posts on my birthday which makes it super-duper cool.

Well I’m off to prepost some more . . . posts. Not only do me and my son go back to school today but we’ve flipped our schedule from last year and we go in the mornings this year, something we’re not used to. AND my hubby is going away tomorrow and will be back Sunday night! I’m going to be one sleepy mommy this week. So I’m cheating on my posts. It’s for the best really, otherwise who knows what I’d be writing about!

Using scraps, adding products and making a display.

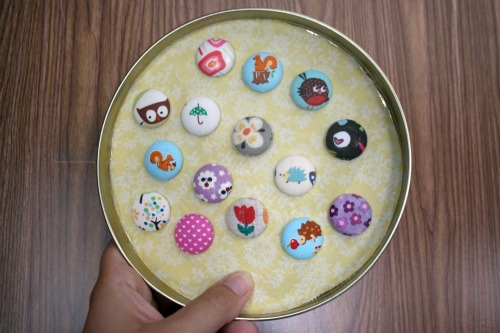
I made a pile of fabric scrap magnets. Some of the fun ones are gone already, but I thought I’d share the fun little display ideas we came up with. At the craft show on Friday all my little magnets were in a dish together and sticking to each other whenever anyone took a look at them. Luckily I was with a creative friend and she came up with a great idea. Then we both went home and made one! Hers is way better though . . . her kid is quietly contained in her belly so she has more time than I do.

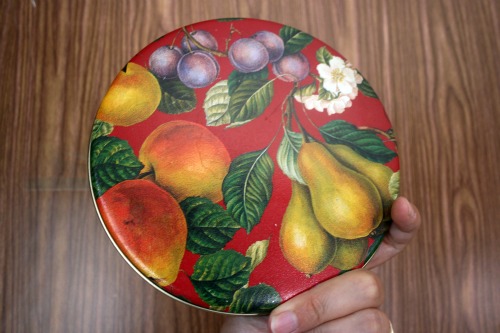
Joanna’s idea was to take a cookie tin lid and Modge Podge some fabric on the inside for a nice backing. I’ll probably add some piping or something around the inside.
I whipped mine up really quickly and wasn’t sure how permanent it was, or if she got to making one, so it’s really easy to take this one apart. Which is good if you need something like this but only have 1 cookie tin and need it later . . . or something.

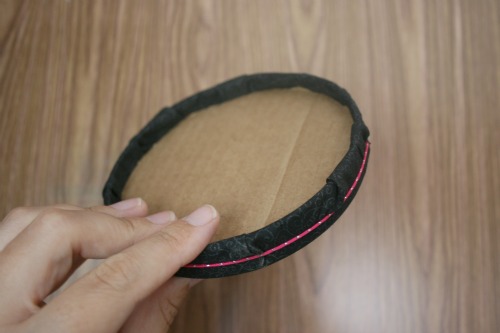
Using a smaller cookie tin lid I cut a circle of fabric and wrapped it around it and secured it in place with a circle of cardboard and an elastic for good measure.

It would stand up nicely on a little plate stand or one of those book display easels. They were a great addition to my cup cozies and bags and totes. Small, cute and inexpensive a lot of people picked one up as they paid and added it to their purchase.

Summer hanky headband DIY

I guest posted over the weekend at amy is the party where she featured a bunch of fun summery projects, like cupcake fondue!! Plus other post by some superfunawesomecool people including Thursday and Crafty Minx. So head over there and have a peek!

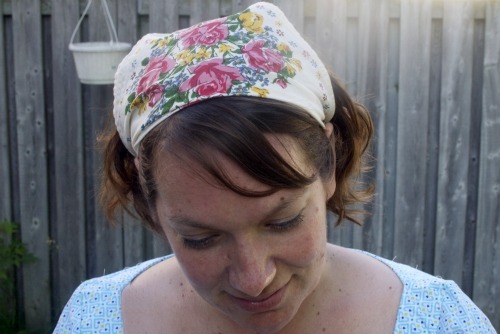
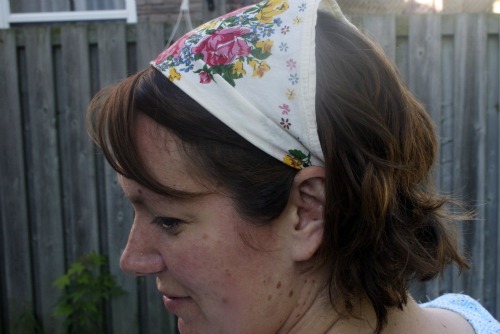
Ok I’m going to show you how to turn a hanky into a fun hair accessory for the summer. It’s a super quick project that you can make with thrifted materials and probably things you have on hand, scraps material and a bit of elastic. I’ve burned my scalp already this summer and I’m hoping this is a cuter alternative to hats.
You will need
– a hanky you like
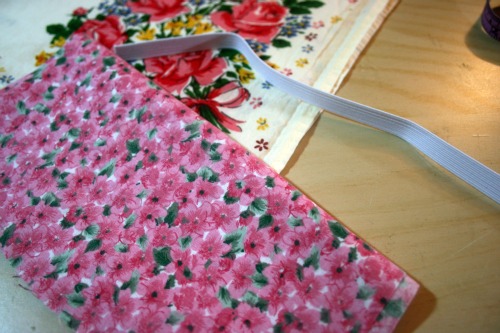
– a piece of elastic (mine was 7″)
– a strip of fabric (3″ x 15″)
Other handy items – safety pin, turning tool,

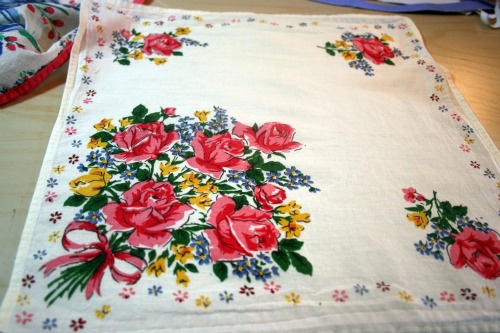
I picked this one because it has a great pattern on one corner which is perfect because you’re going to fold the hanky diagonally.

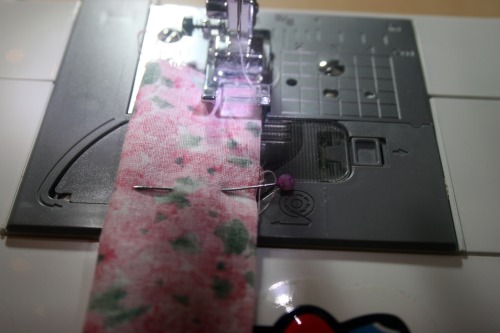
First fold the strip of fabric in half and sew down one side with a 1/4 inch seam.

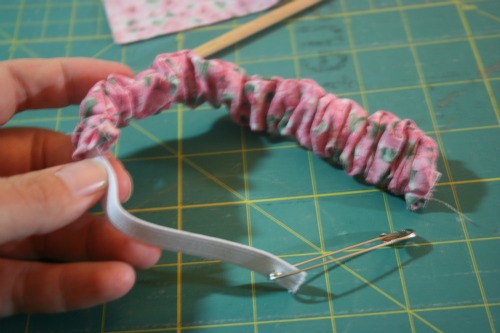
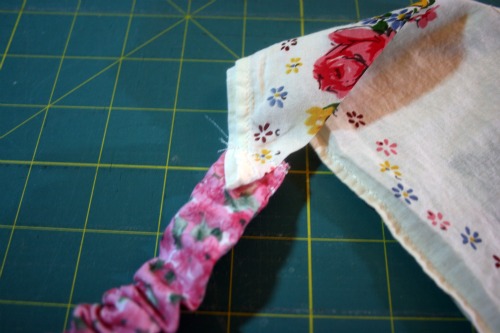
Turn it right side out. This part was a bit tricky, I used my handy little turning tool, this long metal stick thing with a hook on it. Once you have it turned right side out take the elastic piece and feed it through the casing. Sew it in place at one end. Then pull the elastic through so it’s sticking out the other side. It’s easy to guide through if you put a safety pin on the end first.
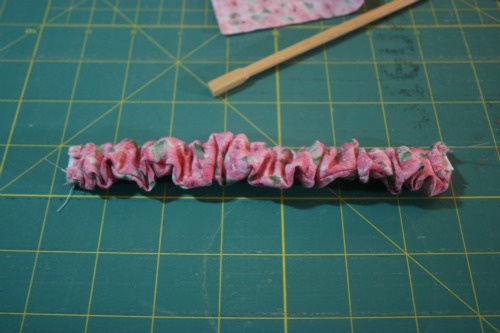
The casing fabric should be all gathered up like a hair scrunchie.
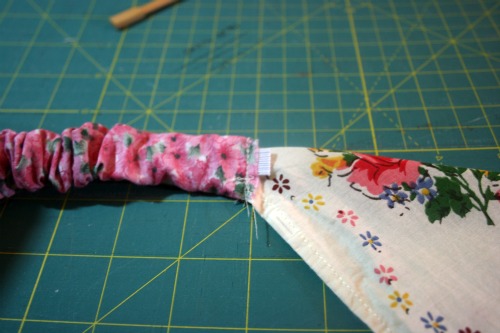
Fold the hanky in half diagonally and sew the stitched up end of the elastic to one corner of the hanky.
Chceck to see how it fits on your head. I had to trim about an inch from the scrunchie piece. Once it’s a comfortable tightness at the back of your head stitch the other end of the scrunchie piece to the other hanky corner.

And voila, a great cool summer alternative to hat head!

Here’s my ‘I’m not ready for a photo’ frontal shot. Sorry for the sunny bit.

DIY vintage pillow case restyle.

On the weekend I turned my kitchen table into a bit of a nightmare so I could squeeze in some crafting while Nate was avoiding his nap. I was working on a project with vintage pillow cases and inspiration hit and took me on a bit of a detour.

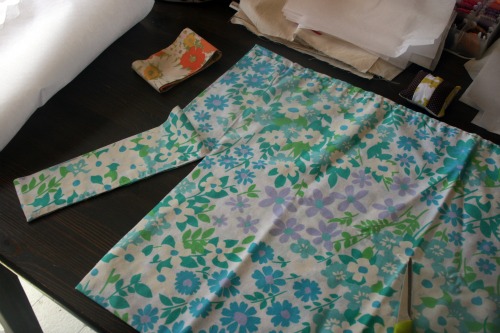
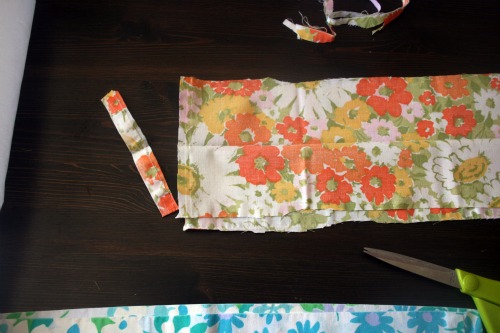
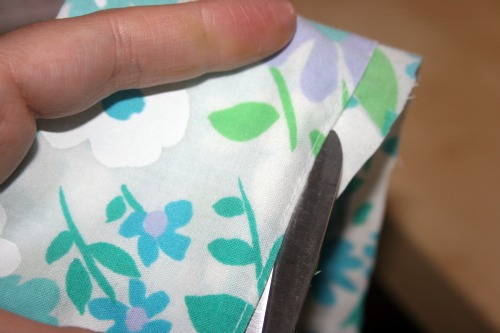
Start with a vintage pillow case and trim off the nice finished edge at the opening where you put your pillow in. You can either trim really close to the stitching and have a closed loop piece, or cut into it and have an open edge. I’m going to show you how to work with both options.

Now you have 2 big loops, cut off the seam so you have one long piece of fabric.

I was cutting the orangey one for another project and in the process I trimmed a bit into the seam and created an opening on one edge. So here’s how to finish that off and make a nice clean edge, and a thinish headband.

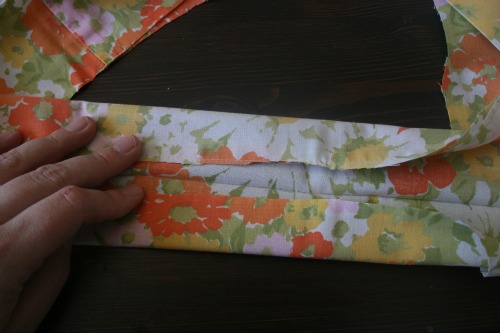
Open the fabric up and use the fold inside, the part that was the very end of the pillow, as a guide to fold the unfinished edges inward. I didn’t go all the way because I wanted my band a bit thicker.

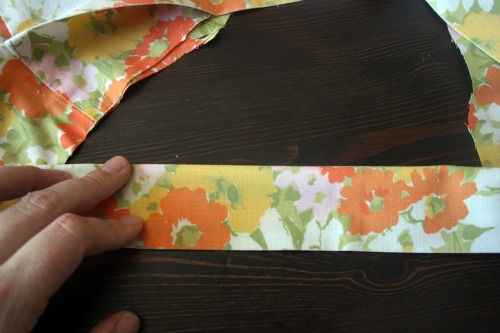
Then fold it again so the raw edges disappear inside. You can iron and pin at this point before you sew. Of forge ahead like I did.

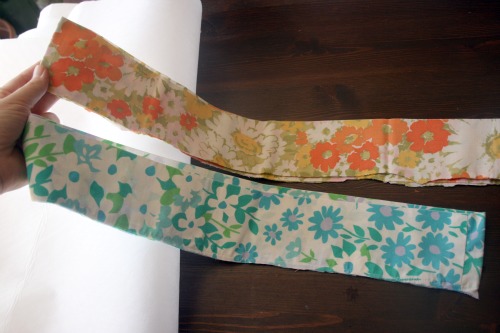
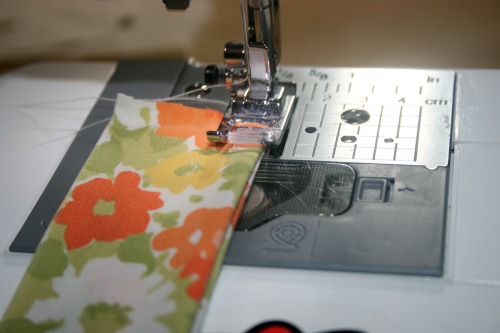
Top stitch along the sides to make nice clean edges. Fold the bottom raw edges up inside the ‘tube’ to create a clean edge and topstitch to seal it all in. Then you have one nice ruler shaped piece of fabric that you can wrap around your head and tie at the back.

For my blue headband I just carefully trimmed around the pre-existing stitching. Why make more work?

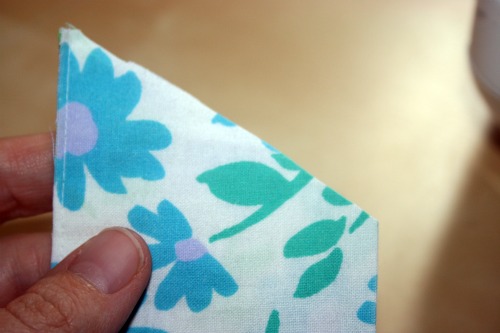
Then I cut the ends on an angle just to had some interest to the ends. Fold the raw edges inside and top stitch around the whole thing.

There you have it, a lovely new headband that was half made already!

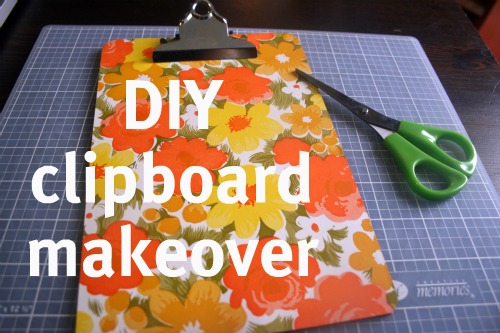
DIY clipboard snazziness

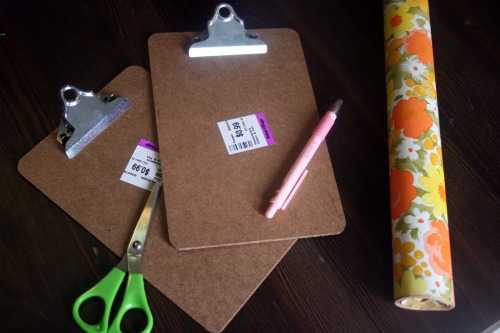
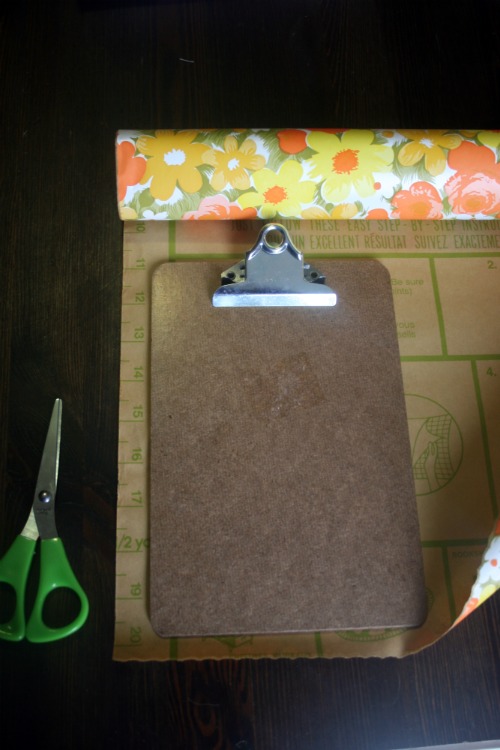
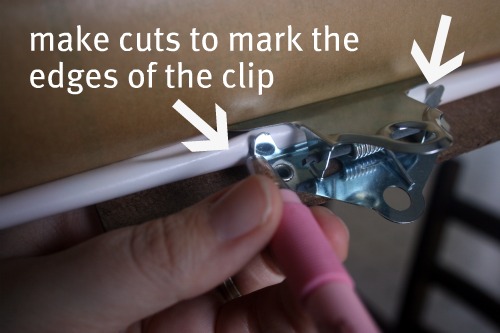
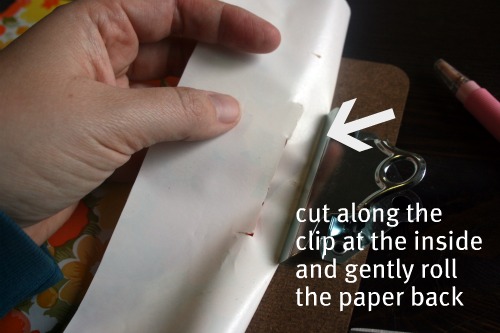
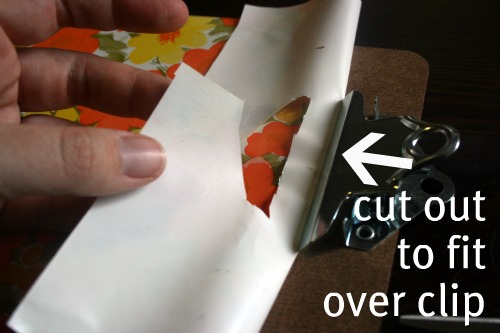
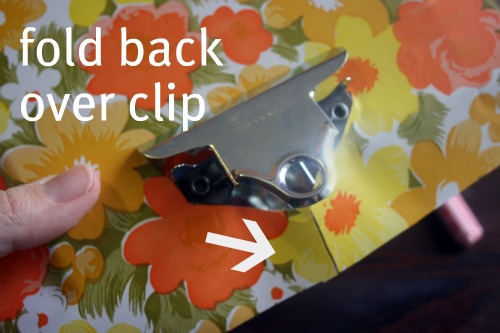
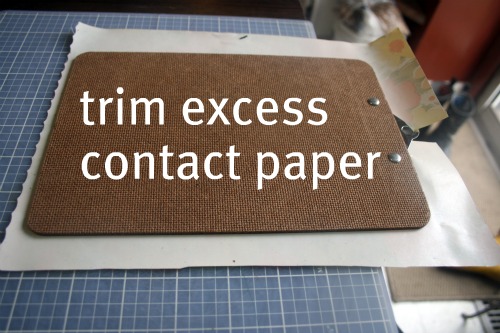
You will need some scissors, an exacto knife or some sort of precise cutting instrument, some shelving/contact paper, a cutting mat helps annnd a clipboard!  My clipboards are little mini ones I picked up for 99 cents each at Value Village.

Remove any stickers or labels from your clipboards before you start.  I left the price tag on my first attempt and there’s a faint outline of the price tag.  Measure your clipboard or just do what I did and lay it on the contact paper and cut out a piece big enough to cover it.

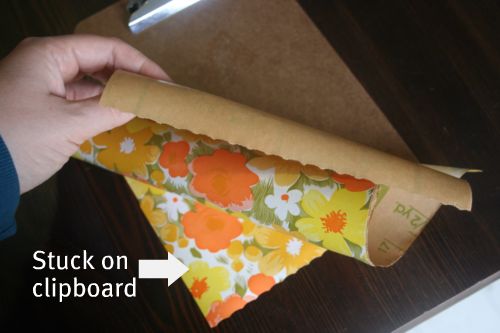
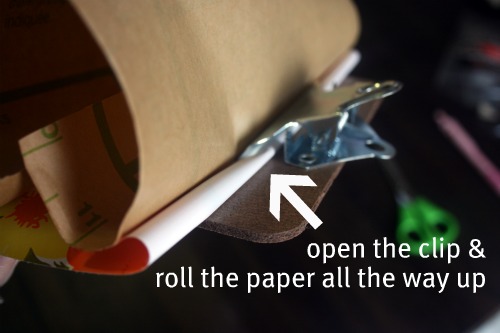
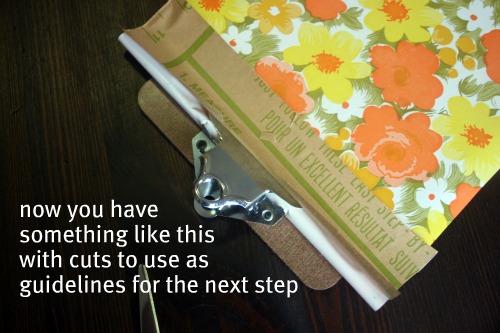
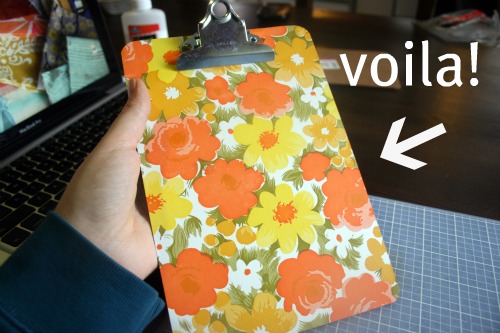
Cut the piece out and starting at one of the bottom corners stick the contact paper on and work across the clipboard making sure there are no bubbles or bumps.


It has been a ridiculously busy week in my house. It’s literally taken me about 5 days to write this post. Which is sad since there’s hardly any writing!

Vintage find and redo.

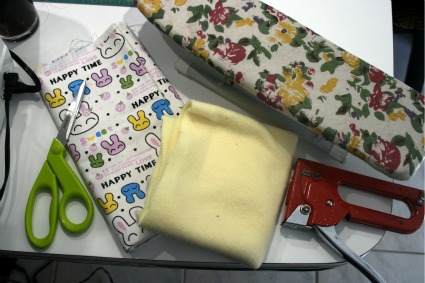
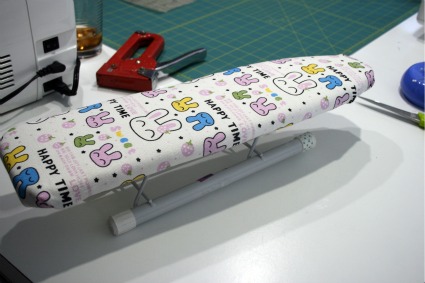
After about a year of communicating I finally met up with fellow crafty chick Cristina of Craftee on Friday night. We went for some yummy food and wandered around to some creative stores. She spotted this little teeny tiny ironing board at the thrift store and I thought it would be perfect for when I use my little teeny tiny mini iron to put my labels on. It was covered in a icky fabric so I decided to recover it.

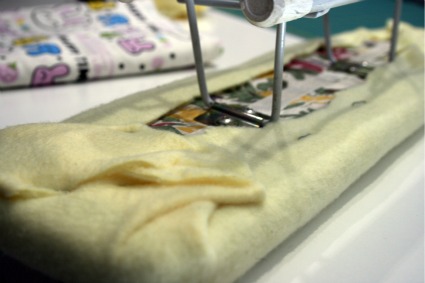
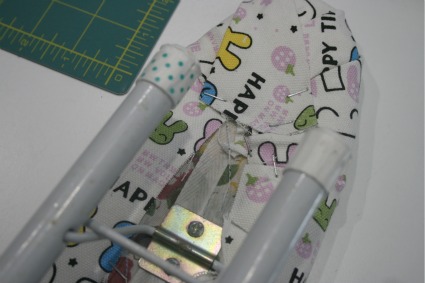
It was just a piece of wood with batting and fabric stapled on it so I went with that design and put my own batting and material on it.

I chose a fun Japanese canvasy type fabric since it’s a little thicker than just a quilting cotton.

Now ironing on my labels won’t seem so work like with these cute little bunnies looking up at me!

DIY Scrapbusting eye pillow project.

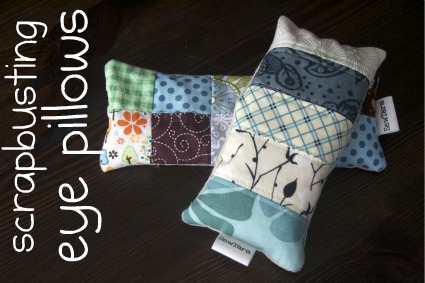
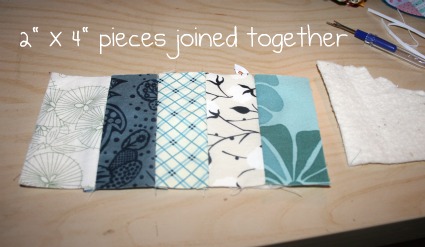
Now that everyone has their lovely scrap swap bits I figured it was time to start sharing some scrapbusting ideas.  I made these fun little eye pillows over the weekend.  For one I used my pre-swap scraps that are all cut into 2 x 2 pieces.  For the other I pieced together 5 2 x 4 pieces.  Either way the math is the same and the finished pillows are the same size, perfect for laying across your eyes and having a quiet moment to yourself.

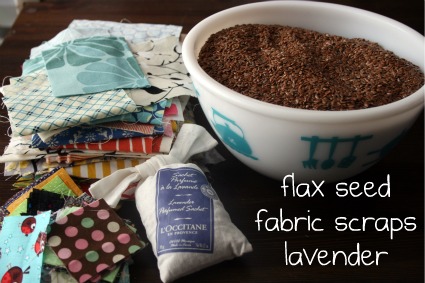
Here’s what you need.  I suppose you could use some other smelly scent but I like lavender and so I just broke open this drawer smelly thing I had and used the bits from inside.

I joined the pieces together and then cut a piece of batting for the back and did some accent quilting.  Then I cut a piece of my nice soft natural cotton for the back.  With right sided together I zipped around and left a little opening to pour in the filling.

I fashioned a little funnel out of paper and poured in flaxseed and lavender until the pillow was full but still floppy enough to curve nicely over my nose.  The last step is sewing up the opening, and voila you have a relaxation aid!

I created a Flickr group where you can post things you’ve made with odds and ends of fabric.  If you make something using one of my tutorials I’d love to see it there.