Category Archives: tutorial-ish

First birthday shirt.

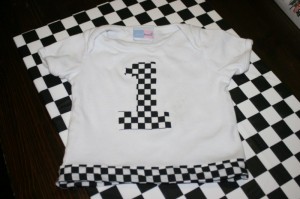
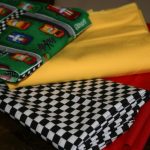
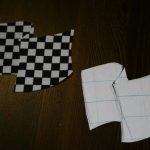
Tomorrow we’re having Baby Nate’s first birthday party, it is a bit early but with the trip we have to push things up.  Tonight I whipped up this shirt for him to wear.  I really wanted to make one, I got the idea somewhere of a number one appliqued over a star.  Since his party is all about Pixar’s Cars I used my checked flag material.

number 1 racing fan

A friend had given me a bag of hand me down baby clothes and there were some onesies in there that would be too short for Nate.  I cut them right at the bottom to make them into little t-shirts. I used Steam-A-Seam to stick the number 1 on.  But I was still worried it would be a bit short and wanted to add some length so I made my own bias tape to add to the bottom of the shirt.  Can’t wait to see him in it tomorrow!

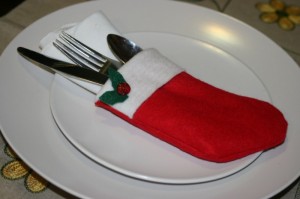
Place setting stockings.

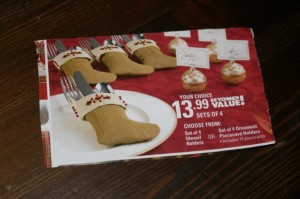
The other day while looking through the flyers I found this neat idea, for $13.99.   Of course I instantly figured I could make something similar quite easily.  And so I did!

ad

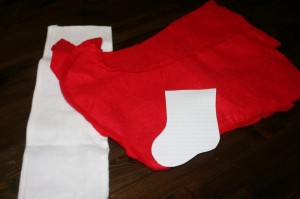
I started with our old stocking.  I believe I got them at the dollar store years ago, and they say our names and I figure we should be Mom and Dad now so it was time for new stockings anyway.  So I disassembled them to re-use the fabric.

old stockings

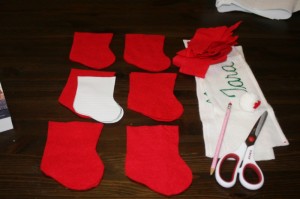
With the help of my friend google, I searched for an image of a stocking and sized it to a size I liked and began cutting!
you get the idea

whee!

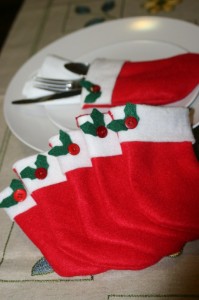
I recovered enough fabric to make 6 stockings.  We’re travelling at Christmas this year and won’t need our stockings and so I have a whole year to make us something snazzy and neat.

table setting

I don’t have any wonderful dishes but you get the idea.

table setting friends

Here are the other stocking friends.  They could also be used as place holders if you stitched names on the stockings.  Perhaps I’ll get to that for next year.

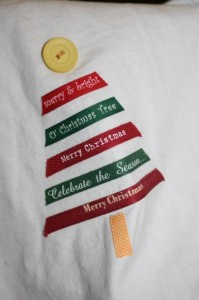
Ribbon Christmas tree t-shirt.

Made this today for my big little guy. I didn’t take an action shot for fear he’d get something on it and I hoped he can wear it out tomorrow.

christmas tree t

I picked the red and green design just to make it look a little boyish. i didn’t have a star button for the top, and I was eager to finish it so it’s a circle, I’m sure he’ll cope. I cut the ribbons and planned them out based on the sayings. Then I stuck them to my new friend, Steam-A-Seam and ironed away. Once again, I am impressed.

I came across the idea online in the last few days but can’t find exactly where. Today when I searched in google I found some other tutorials on it as well. So while I can’t claim I invented this craft I also can’t really know who did. But I do know it’s neat, easy and I like it!

Soft book tutorial.

I tried to make notes as I went along, and take pictures, but it’s hard enough creating something from nothing and then to document it as well!! But here it goes.  Using some advice from Bella Dia, and what I think is my own good sense here are the steps I used in making my fabric counting book.  Hopefully it’s enough information to help you create one too.
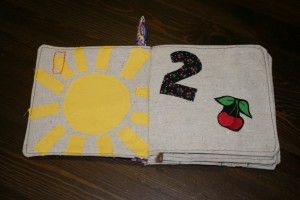
Soft book.

1. Plan – First, because I was lounging at the TV when I was struck with this idea, I sketched out my plan for each page. Knowing what materials I had on hand helped me decide on the page designs.   I made the pages like this:  1 sun, 2 cherries, 3 blind mice, 4 triangles on a kite, 5 fingers on a hand,  6 flowers, 7 colours in a rainbow, 8 fall shapes, 9 buttons and 10 bows.
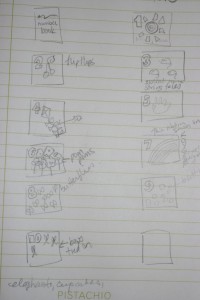
Sketch.

2.  Cut – I cut 10 pieces of fabric, 6 1/2 by 6 1/2 square. I was going to make the cover out of some other material but I decided in the end to use the same fabric and cut 2 more pieces. So you’ll need 12 altogether, split if you want to vary your prints.
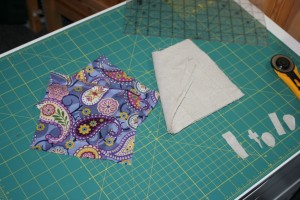
The cover I didn't use and the fabric for the inside pages.

3.  Create (I know it’s a vague step) – Based on your ideas for each page just go to work creating them on each of the 10 squares. I used a variety of methods to put my pages together.  Here’s a layout of all the pages before some finished touches and before they were assembled.
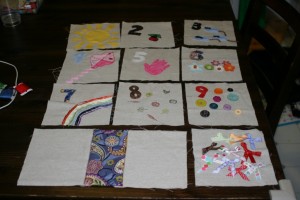
Group shot,

I used Steam-A-Seam, applique, yarn, rick rack, buttons, embrodery, ribbon, rubber stamps and paint to complete all 10 pages.  See my previous post for close up shots of each page.

4.  Page assembly – Pin pages 2 and 3, right sides together, here’s where it takes some thinking, leave the side that will go in the ‘binding’ of the book open for turning.  It’s going to covered by the printed fabric so it doesn’t matter about finishing that edge.   Since I placed all my numbers in the top left corner it was a bit easier to remember what side to leave open.  Turn and Press.  Repeat for pages 4 and 5, 6 and 7, then 8 and 9.  Sew, turn, press.
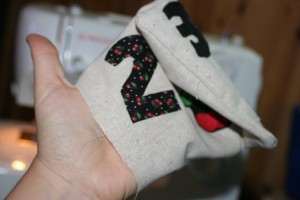
Sewn pages.

5.  Cover creation – Since I decided not to use my original cover pieces I went back and cut some from my linen.  But my supply was running low and I had to cut 6 1/2 by about 6, leaving me a bit short.  So I cut a piece of printed fabric to use as a ‘spine’ for the book.  I accidentally put my fabric where my cold drink of water had been and it got a bit wet, ignore the spots.  I zigzagged stitched the spine to the front cover and back cover of the book.
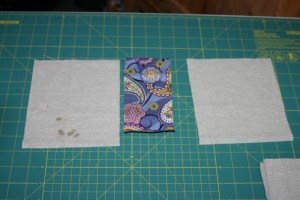
Covers and spine.

6.  Personalize – Attach any sort of label/saying you want on the back page of the book.  Fabric stores have those cute, ‘Made by Mommy’ or ‘For Someone Special’ labels that would work well here.

IMG_2944 [1024x768]

7.  More Personalizing – Decorate the front cover, I personalized mine and embroidered it.  You could appliqué it, or sew some 3D embellishments on.  Then when finished, sew page 1 to the spine, leaving the binding side open for turning.  (Name blocked out for gift surprise protection)
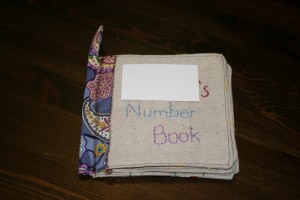
Cover

8.   Cover assembly – Sew page 10 to the back cover, right sides together, sew on the top, right and bottom leaving the left side open for turning.  Then sew page 1 to the front cover , sew on the top, left and bottom, leaving the right side open for turning.
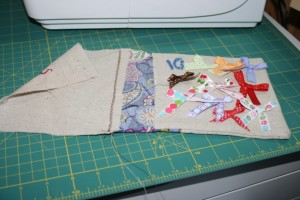
Page 10 attachement.

9.  Loop – I also attached a little loop piece of fabric, it was about 2 1/2 by 3 and I just folded it right sides together, sewed along the long side, turned it and pinned it to the top of the binding.  Sorry for the busy pattern of my ironing board.
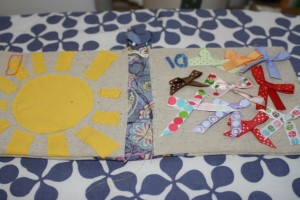
Cover assembly.

10.  Top stitching – Top stitch around the edges of all the pages, as close as possible.  I used a brown thread so it showed on all my pages.  You could get fancy and change threads but at this point I was excited to get finished, hence the lack of photos.  Lay the book cover/page 1 and page 10/back cover page flat.   Fold over and press the book spine part to make a little hem.  Top stitch all around that piece.

11.  Inserting the pages – Once I finished all my top stitching I carefully set the pages inside the book making sure to line all the edges up along the inside at page 1 and 10.  Then I realized just how thick my book was and wondered how on earth I was going to get it under the sewing machine foot!!  I’m relatively new to sewing, and mostly I learn just by trying stuff out so here’s what I did in this situation.  I put the pages in, secured with some pins, folded the cover over the book and then slid it under the machine foot in the middle of the spine where it was thinest.  Then I sewed down to the bottom of the book and backstitched.  Turned the book over, inserted it where my stitching started and went in the other direction to the top of the book.
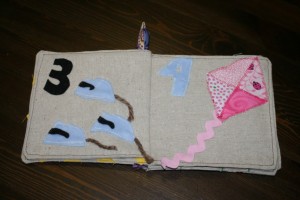
Page 3 and 4.

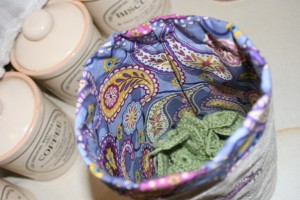
Circle storage for my squares.

I’ve been having fun making squares for my little square scarf, but I’ve also been having trouble storing them, and I’m nowhere near done!

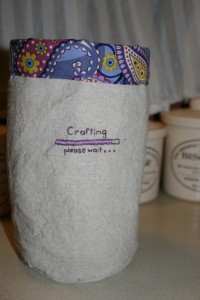
Snazzy storage.

Snazzy storage.

So I came up with the idea to make myself a little storage bucket thingie.  I toyed with embroidering it with some complicated paisley pattern, copying the fabric, but whimped out for a faster and wittier approach.  Here’s how I went about it . . . ish.

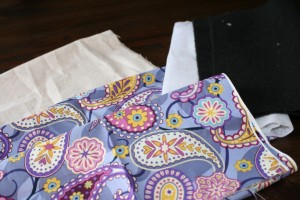
Fabric selection.  I used some black felt to save on interfacing.

Fabric selection. I used some black felt to save on interfacing.

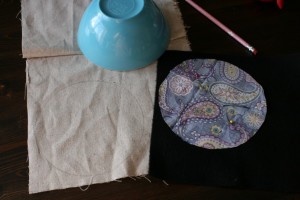
The professional and highly technical template.

The professional and highly technical template.

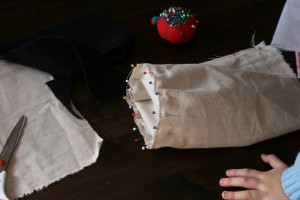
The trickiest part, pinning and sewing on a curve.

The trickiest part, pinning and sewing on a curve. The hand of my little helper.

Witty caption.

Witty caption.

Treating myself.

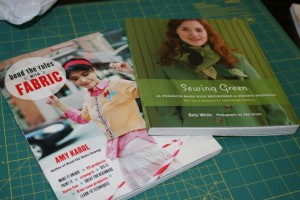
Since I won a $25 mall gift card for my Tooth Fairy costume, I decided to treat myself to some books.  I also had a ‘save $10 if you spend over $40’.  So I picked up Sewing Green by Betz White and Bend the Rules with Fabric by Amy Karol.  Both for about $15!  Being a Mom is a funny thing sometimes, I had a really hard time spending the money on myself.  Even while walking around with the 2 books in my hand I would see a touchy feely book, or something with Thomas the Tank Engine, and start to wonder if I really needed to buy myself something.  In the end I did, but not without feeling weird about it.  Now to make a tea and sit and enjoy them!

Fun books

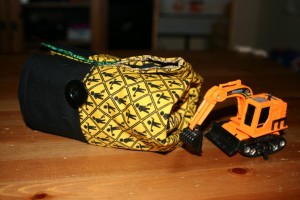
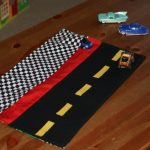
May I present my new invention – the Playcosie!

Looks like the car cosie you say? Ohhhhhh scroll down my friend.

Looks like the car cosie you say? Ohhhhhh scroll down my friend.

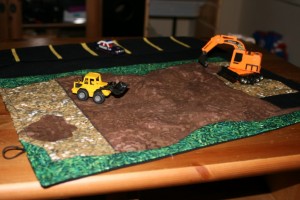
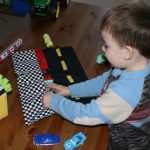
When I gave Wesley his car cosie he thought it was pretty cool.   However, he looked up at me after a few minutes and said, “Where’s the rest of the road?”.  So I thought of making him a playmat, he has mats with roads on them already, but I thought one from me would be neat.  Then today I noticed he had all construction vehicles parked on his cosie and thought I’d make him a construction site playmat instead.  I even have the perfect fabric (which is also part of my work in progress car cosie for Nate).

And so once again here I find myself creating from scratch.  Not using my grid paper this time, but I will jot down the measurements of what I’m doing and make a template later.  BUT I asked myself, why make it just a play mat? what about the vehicles? does he have to carry his car cosie as well?  So I had the idea to incorporate the car cosie pocket idea into a parking lot and then the vehicles are stored easily and the playmat could fold and roll up just like a larger version of the car cosie!!  I’m getting pretty brave for a ‘sometime’ sewer.  Here’s how I’m doing it.

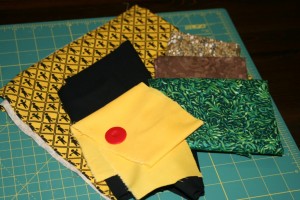
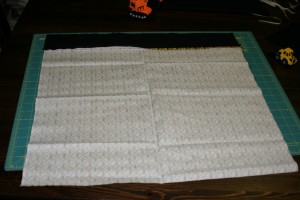
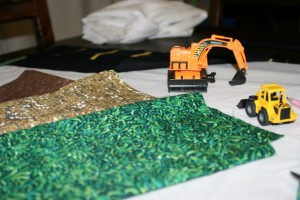
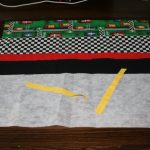
1. I have a construction themed fabric for the backing (18 x 22, from Walmart’s craft section), black for the road and parking lot, yellow for the lines, green for grass, brown for the dirt and a patterned stone print for here and there.  I may have to break out the Steam a Seam again for the appliqué, we’ll see.

Fabric selection

Fabric selection

2.  I cut a piece of black fabric to be the pocket (10 x 22), fold in half and iron. I sewed it to piece of black fabric to be a road in front of the parking spaces ( 8 x 22, just because). I suppose you could just cut this all as one piece and press twice to be pockets and a road but I wasn’t being that logical. Attach the pocket piece to the road piece by sewing along the raw edges.

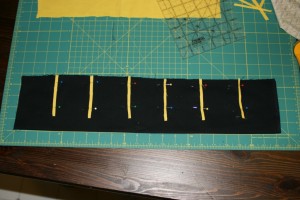
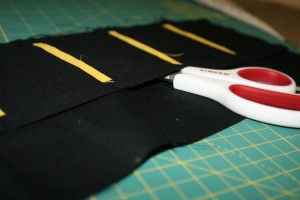
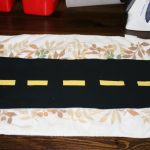
3. Pin it at about 3 inch intervals, leaving 1/4 for seams. This 3 inch part was a bit ‘ishy’, I eyeballed it after I didn’t like the 3 inch spaces. Sew along those lines over the edge of the fold a little bit. One tutorial I read said to be sure to backstitch as those pockets are going to get a lot of use from little hands.Then I got out my new love, Steam a Seam and cut out little yellow lines which I ironed on over the pocket stitching. I recommend not sliding the iron around the fabric but rather use a lift and press technique as those little yellow lines might jump onto your iron and get all sticky and messy. Just saying, it could happen.

Parking lot in progress

Parking lot in progress

Voila, a pocket.

Voila, a pocket.

4. Decide how big you want your construction site.  If you attach the pocket piece at the edge of your outside material your mat will be around 18 x 22 inches total.  Depending on your needs and the child that might be big enough.  OR if you want more play for your buck you can slide the parking lot up a bit, cut a ‘filler’ piece of fabric for the outside, some nice co-ordinating print perhaps and have a bigger mat.  I had a scrap of black so I added a couple of inches to mine, making is almost square, 21 1/2 x 22.

Wrong side with strip I added for more space.

Wrong side with strip I added for more space.

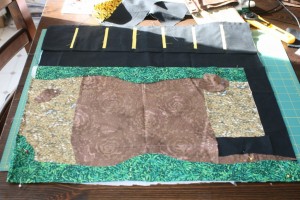
5.   Now it’s time to get wild and crazy!  I didn’t want to use interfacing but wanted to add some weight to the project, so I cut a piece of white lining to fit the entire area.  Then I marked off where my pocket/road section would end.  Then it’s time for a bit of freestyling to fill up the construction site!  Lots of mud?  dirt? a puddle of water? some grass? pile of wood? pilons? whatever!  Fill  up the remaining space either quilt style or appliqué with scraps or prints picked special for this purpose.

Decisions, decisions.

Decisions, decisions.

Rough plan (sorry for the sun)

Rough plan (sorry for the sun)

6. Once you have that all worked out sew it to the lining. First I went all around the perimetre with a straight stitch. Then I used a zigzag stitch and just went around everything with black thread. I figured it’s a construction site it can look a bit rough. I also hope it stops fraying and secures the pieces down from my 2 little munchkins.

Look close for zig zags.  Wesley was waiting at the machine and ran off with this to play.  So no detail picture.

Look close for zig zags. Wesley was waiting at the machine and ran off with this to play. So no detail picture.

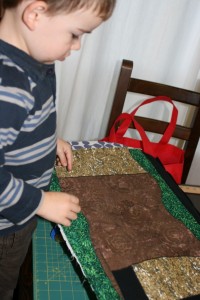
7. Now we got my trusty friend Steam a Seam out again and placed some mud puddles here and there. This part was fun because Wesley could help me do it and it can hide any stitching or spaces you just don’t want anyone to see.

Wesley wanted to put them all in the big mud area in the middle.  I stiffled his creativity and moved them around a bit to where I wanted them.

Wesley wanted to put them all in the big mud area in the middle. I stifled his creativity and moved them around a bit to where I wanted them.

8.  Now put things right side together, sew all around, remember to place an elastic for the button and leave an opening to turn. I put the elastic loop in and sewed all around leaving the space across from the loop open to turn. Then I came upstairs and put some cars and trucks into the parking spots, rolled it up and got a feel for where a button should go. Then I reached into the hole and attached the button.

10.  Time for some top stitching fun!!  Turn the project right side out and press to get a nice crisp fold. Top stitch all around the edges of the project.  If you’re a quilter you can even get fancy and do some stitching around the playmat (not on the parking lot!).

I'm sure I have these all set up wrong, Wesley will fix it in the morning.

I'm sure I have these all set up wrong, Wesley will fix it in the morning.

11. Ta da!

All rolled up and ready to go!

All rolled up and ready to go!

Things I learned:

– I should make my patterns and do my thinking during the day so I just have to follow steps at night when the kids are in bed and I try to sew.

– Lots of black scraps, left over from mistakes, isn’t so bad.  It can be parking lots on some other playmat.

– Having yellow thread on hand would have saved me a step.

– I need a bigger cutting mat.

– Don’t tell your child what you’re doing when making them something cool they will really like. It makes things go slower.

Found treasure.

I took the kids for a big walk the other day, it was so nice and unseasonably warm.  It was recycling day and we passed a pile at the curb and Wesley noticed a Little Tykes easel sitting there.  Nothing was wrong with it, other than being covered with paint and crayons, and he started talking about it and walked over to it, and of course he asked if he could have it.  He was so excited about it I figured why not.  I wonder how much useful stuff ends up in landfills? I knocked on the door to ask the people if I could leave it in their driveway and come back for it with the van but no one was home.  So there I was walking home carrying a big bright coloured easel under my arm while pushing a sit and stand stroller with 2 kids in it!

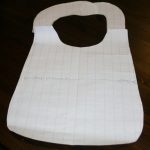
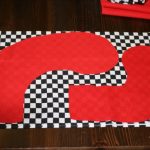
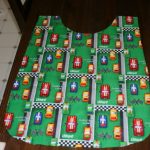
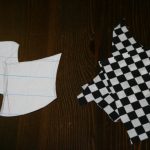
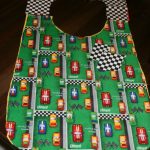
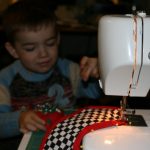
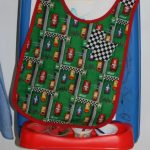
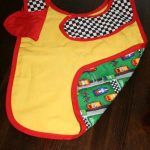
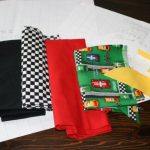
I got it home and cleaned it up and was inspired to make Wesley a smock for all the dirty painting and colouring he’s going to do.  Essentially it’s just a big bib.  However, I did add the challenge of making it reversible (although my husband said if it’s for painting why would you want to reverse it)  and I decided to add an appliqué design.  Here’s the sort of tutorial.

Things I learned:
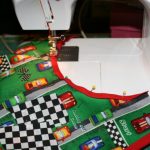
– Bias on very curvy bits is not fun. In future I’ll just sew right sides together, turn and top stitch. While it looks really nice it cost more and was finicky.
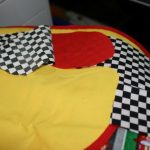
– I should have sewn the ‘back’ pieces to the front piece a the beginning. I did them separately and then had to worry about the bias and edges lining up properly. I also had to cover the hem on the inside.
– The patterned side is already pretty busy. Next time the appliqué should go on the solid side to dress it up a bit.
– Despite all that, I’m pretty awesome.

Car cosie.

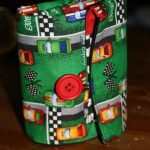
I came across this tutorial the other day and had to try it. So I gathered some car themed fabric and set to work. The tutorial was easy to follow and I even made a change and added a elastic and button closure rather than a ribbon.

Now I have to set to work making another one for little brother. There’s already been some scuffles. Luckily I found some perfect fabric today so I’m excited to get to work. Oh, and luckily Nate’s only 10 months old so I can probably finish some other projects first!