Category Archives: other crafts

My shadow box with a story.

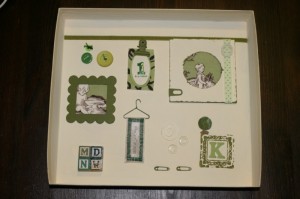
I’ve been trying to keep on track with Style School and keep up my current craft a day speed. So I made my own ‘shadow box with a story’.

story box

The buttons are just fun and all about sewing, scrapbooking and cardmaking. The ‘1 in a million’ is a heads up for my Dad, who was one in a million! I found some vintage looking fabric with little boys on it and cut and framed those little pieces, to represent Wesley and baby Nate. The alphabet blocks are for the boys’ names and Mom and Dad, that’s who I am right now so I used that and not T for Tara. I made a little SewTara banner, in honour of my new little addiction. The K is for our last name and I added the little globe for our travel fever.

It was loads of fun to make and surprisingly difficult to think about items to represent myself.

Easy Wreath Idea

I found this wreath idea in a magazine in *cough* 1999.   I went on a binge years ago and made a ton of them and gave them away to people or as Christmas gifts.  Now I’ve only got my one banged up one left.   I don’t have time to make a new one right now so perhaps next year I’ll make some new little men to replace the ones who have broken in the line of duty.  Here’s a bit of a tutorial, what I could throw together without actually making on and taking the pictures.
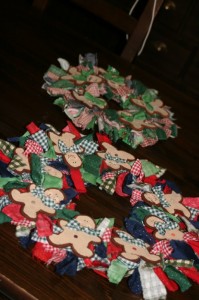
wreaths

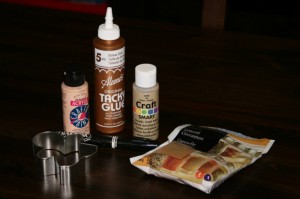
Here’s what you need

supplies

1. ring of something pretty sturdy, cardboard works, or you can buy the fancy ones from a craft store and sometimes a dollar store.

2. gingerbread man cookie cutter

3. glue gun and glue sticks for it

4. tacky glue

5. 1 1/4 cups of cinnamon

6. 56 scraps of fabric, measuring 1″ x 9″, It’s more rustic looking if you tear the fabric but you can cut it too.  9 1′ x 4″ fabric scraps, cut these ones.

7. rolling pin, cookie sheet and wire cooling rack

8. some acrylic craft paints, colours can vary but I used a tan, and pinkish colour.  A paintbrush and I had a black marker on hand, rather than paints, for details.

Here’s the handy steps!

1. Mix one cup cinnamon with 4 tablespoons of tacky glue and 3/4 cup water.  Mix it around until you have a stiff dough.  Add more of something to achieve that consistency.  Place the dough on the counter and sprinkle with cinnamon so it won’t stick to the roller.  Roll dough out to about 1.4″ thickness.

2. Cut out 9 gingerbread men and transfer them onto the wire rack.  Place the wire rack on a cookie sheet and bake at 200 for about 2 1/2 hours.  Turn the men over every 20-30 minutes.  Your house will smell wonderfully of cinnamon!  Leave the cooked men on the rack overnight.  They might curl slightly.

3. Paint most of the men with the tan paint, leaving a little bit of the gingerbread edge showing.  This may take a few coats to cover the way you like.   Add little rosy cheeks and eyes and a mouth.
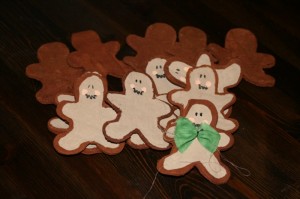
little men

4.  Tie the little 4″ strips into bows and glue gun them to the men to look like little bow ties.

5.  Set the men aside and pick up whatever you have for a circle!  Tie the 1″ x 9″ fabric strips around the circle until it is entirely hidden by fabric.  Photo shows the back.
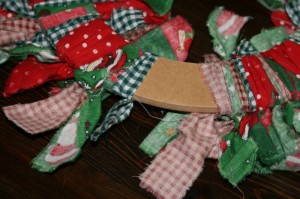
bows

6. Once it’s entirely covered place the ginger men around the wreath with room at the top for your hanging device, be it ribbon or an actual hanger from a door.
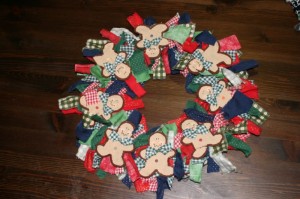
ta da!

As I’ve learned, and you can see from a few of my men, they are fragile and can break so store your wreath lovingly.  The men also smell like cinnamon for some time, so if you can keep it in some sort of sealed box that will help preserve the smell.  What’s more festive than yummy smelling cinnamon!

Cupcake nutcracker.

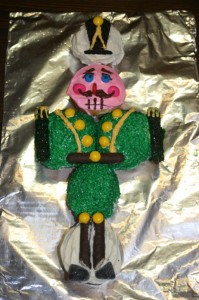
nutty

Teehee.  Today I went to a class and we made this cute little guy!  It’s from a book called Hello Cupcake.  His face is a little worried because it’s a terribly wet and slushie day here today, snow, rain, slush . . . I think he was upset about getting rained on and worried about the trip home!

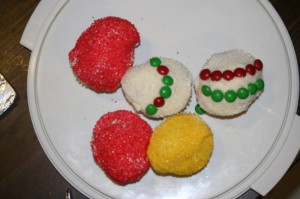
left overs

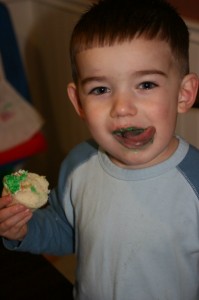
We ran out of time but we were going to make the other half dozen look like Christmas ball ornaments. Instead we just dipped them in yummy sugar and brought the supplies home to decorate them on our own. However, mine probably aren’t going to make it that far!

natewesley

Santa’s plate, when he’s at our house.

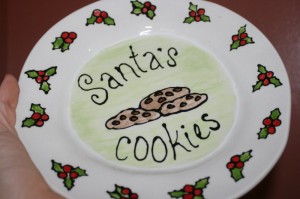
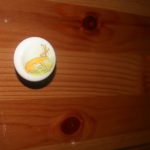
I made this plate earlier this year to use as our special Santa plate. I figured we could bake some cookies and heap the plate with them on Christmas Eve. Sadly, we’re travelling this year and I don’t want to risk breaking it by taking it on a bunch of airplanes so it won’t get used until next year. I am debating adding a mug to match. I mean Santa needs a drink to wash down all those yummy cookies!

santa's plate

Christmas tree ornaments, made by my little men.

We made this ornaments for our tree.    I used to have only handmade ornaments, I would paint some every year, but we’ve decided to pick them up as souvenirs as well.  So now everything on the tree is meaningful in some way, it was a gift, or handmade, or bought in some exotic land!  I made these ones with the boys this year, they’re actually Crock-A-Doodle ornaments that I got crafty with. I dipped one of their fingers in the green paint and made a little circle with the fingerprints. After is was glazed and kilned I added a little satin ribbon bow and stuck it on with a glue dot for a cute little embellishment.

Treating myself.

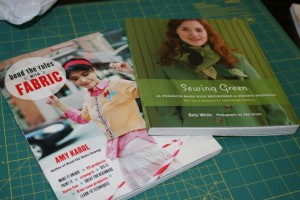
Since I won a $25 mall gift card for my Tooth Fairy costume, I decided to treat myself to some books.  I also had a ‘save $10 if you spend over $40’.  So I picked up Sewing Green by Betz White and Bend the Rules with Fabric by Amy Karol.  Both for about $15!  Being a Mom is a funny thing sometimes, I had a really hard time spending the money on myself.  Even while walking around with the 2 books in my hand I would see a touchy feely book, or something with Thomas the Tank Engine, and start to wonder if I really needed to buy myself something.  In the end I did, but not without feeling weird about it.  Now to make a tea and sit and enjoy them!

Fun books

Foray into appliqué

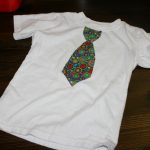
I’ve wanted to make my kids some T-shirts for a while. While on a Joann’s shopping trip I found some really cute iron ons and was eager to try them. I had two plain 3T shirts and used one of the iron ons. It worked really nicely, went on well, however, my son wore it once, I hand washed it (as directed) and noticed the lines breaking and I have little faith that the design is going to last. So, going with, ‘if you want something done right do it yourself’, I’ve decided to create them myself.

I kept it simple the first time, I’ve never done appliqué, so I went with an easy simple shape and put a bright tie on the shirt. I used Steam a Seam and it worked like magic! I’m glad I explained to the lady at Fabricland what I intended to do, otherwise I would have bought the wrong thing entirely. It was really simple to work with and even requires no sewing, if you feel so inclined, apparently edges will not fray or separate. I did stitch around the tie for some extra detail.

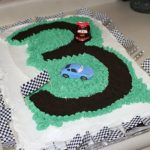
Wesley’s cake.

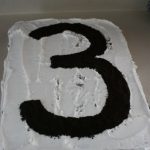
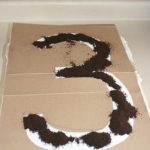
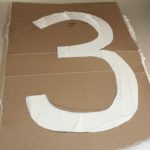
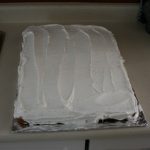
I’ve made the mistake of making Wesley some really neat cakes for his 3 birthdays. Now the pressure is on to keep up the amazing performances, if not take it up a notch each year. Here’s how I made this year’s cake. We did a Lightening McQueen party this time around.

Hallowe’en fun!
PSSSSHHHHHH!!
PSSSSHHHHHH!!

We’re pretty new at this Trick-or-Treating here but I know how it goes.  One thing I wasn’t prepared for was the constant mind changing about what costume he wanted to wear!!!  First he wanted to be Spiderman, so off I went to get a costume, which turned out to be waaay to big when we got home.  So I headed back to exchange it and Wesley decided he wanted to be a firefighter.  We had the hat at home, borrowed the coat, and I set to work to make a hose, complete with spraying water!!

I made the hose from craft foam and sparkily pipe cleaners.

I made the hose from craft foam and sparkily pipe cleaners.

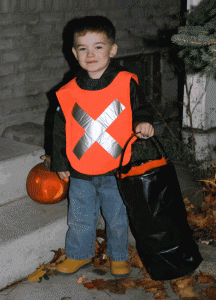
Hat and orange fleece pinney with ducktape.

Hat and orange fleece pinney with ducktape.

Thursday night’s party he dressed in his firefighter outfit.  He didn’t seem to like it and ended up taking the costume off before the end of the party.  I suggested he could be Bob the Builder, he seemed excited, I set all the things out for his playdate in the morning and figured that was his new costume.  Then Friday before we headed out the door, with his hard hat on, orange pinny and hammer in his carpenter pants, the garbage truck pulled up next door.  He was mesmerized by (he usuallay is) but as it crushed the couch our neighbour left out,  off came the hat and away went the hammer and Wesley became a garbage man!! Thus his Halloween costume was born!

garbageman Wesley

garbageman Wesley

Guess how much I love Nate’s nursery

Before I was even pregnant I was looking for a neat nursery theme/idea. When our first son was born we were house sitting for my in-laws so we didn’t really get to go all out and create a baby room.  The second time around I fell in love with the idea of a room based on the book Guess How Much I Love You by Sam McBratney and with the lovely artwork by Anita Jeram. I had seen an entire crib set on ebay before but once pregnant I searched and searched, finding nothing, I realized that I should have gotten the gently used one I had seen, even though it had been $150 AND we weren’t pregnant.

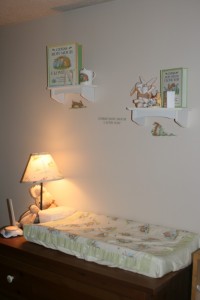
Dresser/change table.

I found crib sets listed online but always hit some lame ‘out of stock’ message or notice. I forged ahead thinking I’d just sew the bedding. However, I had terrible luck finding fabric. I debated using solid colours for the bedding and use themed accessories decorating the room instead. On ebay I found custom made knobs for the dresser with the characters on them and a light switch plate. I found wallpapers and murals but they were crazily expensive and shipping to Canada was atrocious! I decided I’d just use my projector and paint my own mural.

Finally, as a last ditch effort, I emailed the publishing company. I told my story and asked if they knew where I could get bedding or fabric if need be. A very nice Rob emailed back, the reason is sketchy in my mind now, but something about the one company that printed the fabric and bankruptcy. It appeared I was out of luck. I kept looking hoping to find something used or hidden away somewhere. Then one day I randomly got an email from Rob again. He said they were going to have some sort of big show and would be cleaning out the warehouse and he thought there might be some stuff tucked away that could help me. He promised to email when the show was over. Sure enough he did and sent pictures of all that he had found, and it was a ton!!!! He had an entire crib set, wall stickers, a blanket, a lamp shade, the 2 little stuffed hares, a diaper holder . . . it was amazing!!! There were even colours to choose from!

Decorative knob.

My mom made this for me when I was little, a little teddy bear goes in the bed.  I snuck in little nutbrown hare.

My mom made the little embroidered picture  for me when I was little, a little teddy bear goes in the bed.  I snuck in little nutbrown hare.

We didn’t know what flavour our little bundle was but I figured I’d play it safe, and knowing my husbands family I was sure it was going to be a boy. So I took everything he had that was green, gender neutral and the diaper holder which had a blue band at the top but I figured I could remedy that if needed. Since the items were kicking around in the warehouse helpful Rob just had to make up a price he felt was fair. So for the bargain price of $170 USD plus shipping, I was able to decorate the entire nursery!!

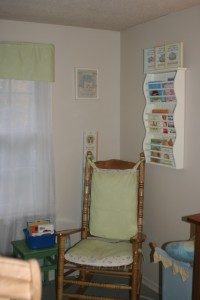
Rocking chair cushions, windown panel above sheers, and the awesome Pottry Barn book shelf.

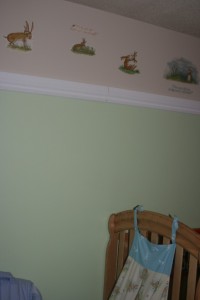
Trim and wall stickers.

There’s the rocking chair cushions, window panel above sheers, and the awesome Pottery Barn book shelf.

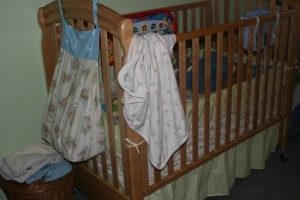
There was only one issue. When the box arrived I realised that the ‘crib set’ was really a set for a small cradle! I had to do some creative sewing. Luckily there was enough bumper pads to cover 3 sides of the crib and I just had to sew one extra panel. There was a fitted cradle sheet set I wasn’t going to need to I used that to create the panel, along with cushion covers for the rocking chair and a window treatment. Too bad my son’s too little to appreciate it all!

Diaper holder and crib bedding.

Diaper holder and crib bedding.