Category Archives: kid fun

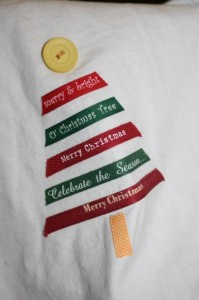
Ribbon Christmas tree t-shirt.

Made this today for my big little guy. I didn’t take an action shot for fear he’d get something on it and I hoped he can wear it out tomorrow.

christmas tree t

I picked the red and green design just to make it look a little boyish. i didn’t have a star button for the top, and I was eager to finish it so it’s a circle, I’m sure he’ll cope. I cut the ribbons and planned them out based on the sayings. Then I stuck them to my new friend, Steam-A-Seam and ironed away. Once again, I am impressed.

I came across the idea online in the last few days but can’t find exactly where. Today when I searched in google I found some other tutorials on it as well. So while I can’t claim I invented this craft I also can’t really know who did. But I do know it’s neat, easy and I like it!

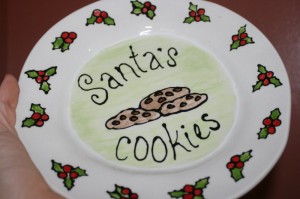
Santa’s plate, when he’s at our house.

I made this plate earlier this year to use as our special Santa plate. I figured we could bake some cookies and heap the plate with them on Christmas Eve. Sadly, we’re travelling this year and I don’t want to risk breaking it by taking it on a bunch of airplanes so it won’t get used until next year. I am debating adding a mug to match. I mean Santa needs a drink to wash down all those yummy cookies!

santa's plate

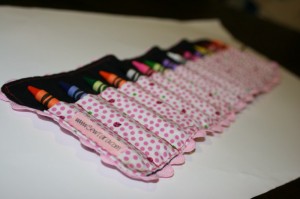
Crayon cozy – attempt #1.

Thanks to this tutorial I was inspired to try a crayon cozy.   It was fun and I only  made one ‘oops’.

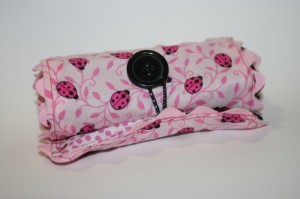
crayon cozy

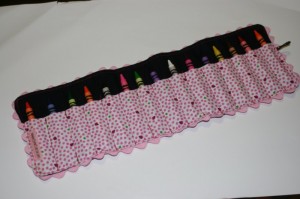
I even got fancy and added my own little lable to it.  I did however make a mistake when cutting the pieces and for some reason it’s about an inch too short.  The result is it only holds 15 crayons rather than the 16 it should.  So out you go Red-Orange, who needs you anyway when there’s Orange and Yellow-Orange!?

Unrolled

I got a little bit inventive and added a button and elastic closure.  I’m a pro at that after my car cozy and playmat.

rolled up

Soft book tutorial.

I tried to make notes as I went along, and take pictures, but it’s hard enough creating something from nothing and then to document it as well!! But here it goes.  Using some advice from Bella Dia, and what I think is my own good sense here are the steps I used in making my fabric counting book.  Hopefully it’s enough information to help you create one too.
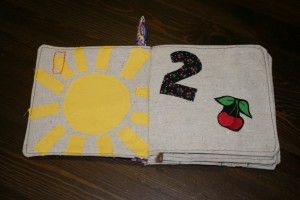
Soft book.

1. Plan – First, because I was lounging at the TV when I was struck with this idea, I sketched out my plan for each page. Knowing what materials I had on hand helped me decide on the page designs.   I made the pages like this:  1 sun, 2 cherries, 3 blind mice, 4 triangles on a kite, 5 fingers on a hand,  6 flowers, 7 colours in a rainbow, 8 fall shapes, 9 buttons and 10 bows.
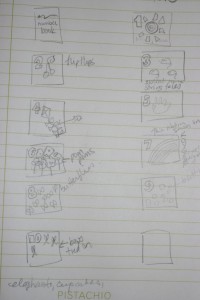
Sketch.

2.  Cut – I cut 10 pieces of fabric, 6 1/2 by 6 1/2 square. I was going to make the cover out of some other material but I decided in the end to use the same fabric and cut 2 more pieces. So you’ll need 12 altogether, split if you want to vary your prints.
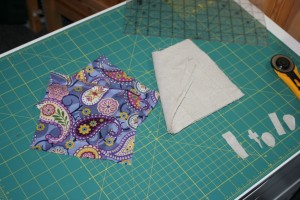
The cover I didn't use and the fabric for the inside pages.

3.  Create (I know it’s a vague step) – Based on your ideas for each page just go to work creating them on each of the 10 squares. I used a variety of methods to put my pages together.  Here’s a layout of all the pages before some finished touches and before they were assembled.
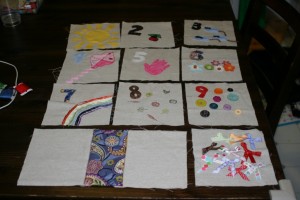
Group shot,

I used Steam-A-Seam, applique, yarn, rick rack, buttons, embrodery, ribbon, rubber stamps and paint to complete all 10 pages.  See my previous post for close up shots of each page.

4.  Page assembly – Pin pages 2 and 3, right sides together, here’s where it takes some thinking, leave the side that will go in the ‘binding’ of the book open for turning.  It’s going to covered by the printed fabric so it doesn’t matter about finishing that edge.   Since I placed all my numbers in the top left corner it was a bit easier to remember what side to leave open.  Turn and Press.  Repeat for pages 4 and 5, 6 and 7, then 8 and 9.  Sew, turn, press.
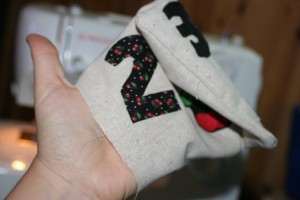
Sewn pages.

5.  Cover creation – Since I decided not to use my original cover pieces I went back and cut some from my linen.  But my supply was running low and I had to cut 6 1/2 by about 6, leaving me a bit short.  So I cut a piece of printed fabric to use as a ‘spine’ for the book.  I accidentally put my fabric where my cold drink of water had been and it got a bit wet, ignore the spots.  I zigzagged stitched the spine to the front cover and back cover of the book.
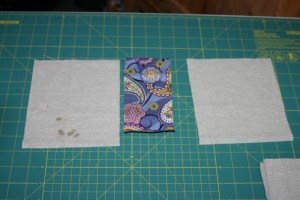
Covers and spine.

6.  Personalize – Attach any sort of label/saying you want on the back page of the book.  Fabric stores have those cute, ‘Made by Mommy’ or ‘For Someone Special’ labels that would work well here.

IMG_2944 [1024x768]

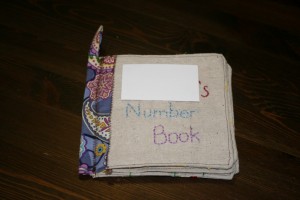
7.  More Personalizing – Decorate the front cover, I personalized mine and embroidered it.  You could appliqué it, or sew some 3D embellishments on.  Then when finished, sew page 1 to the spine, leaving the binding side open for turning.  (Name blocked out for gift surprise protection)
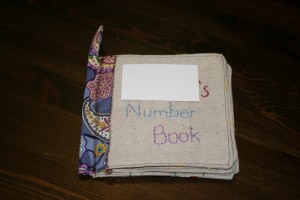
Cover

8.   Cover assembly – Sew page 10 to the back cover, right sides together, sew on the top, right and bottom leaving the left side open for turning.  Then sew page 1 to the front cover , sew on the top, left and bottom, leaving the right side open for turning.
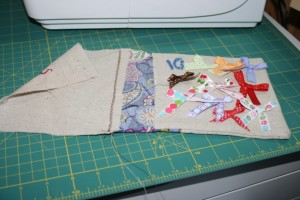
Page 10 attachement.

9.  Loop – I also attached a little loop piece of fabric, it was about 2 1/2 by 3 and I just folded it right sides together, sewed along the long side, turned it and pinned it to the top of the binding.  Sorry for the busy pattern of my ironing board.
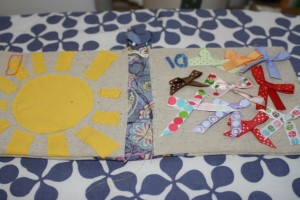
Cover assembly.

10.  Top stitching – Top stitch around the edges of all the pages, as close as possible.  I used a brown thread so it showed on all my pages.  You could get fancy and change threads but at this point I was excited to get finished, hence the lack of photos.  Lay the book cover/page 1 and page 10/back cover page flat.   Fold over and press the book spine part to make a little hem.  Top stitch all around that piece.

11.  Inserting the pages – Once I finished all my top stitching I carefully set the pages inside the book making sure to line all the edges up along the inside at page 1 and 10.  Then I realized just how thick my book was and wondered how on earth I was going to get it under the sewing machine foot!!  I’m relatively new to sewing, and mostly I learn just by trying stuff out so here’s what I did in this situation.  I put the pages in, secured with some pins, folded the cover over the book and then slid it under the machine foot in the middle of the spine where it was thinest.  Then I sewed down to the bottom of the book and backstitched.  Turned the book over, inserted it where my stitching started and went in the other direction to the top of the book.
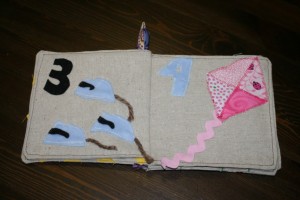
Page 3 and 4.

Cloth counting/quiet book for a mystery baby!

Within the span of about an hour on Friday night I went from having an idea for a cloth counting book to sketching out a plan and cutting the fabric.    So here’s a peek at the finished product.  I’m so hyped!!! I can’t believe how well it turned out.  Or how sad I am that I made it as a gift and have to give it away!!  Now I’ve started to work on one for my son so I can keep it around.  I personalized the cover so had to hide the name so the wonderful mom who reads my blog doesn’t discover what I’ve made her child for Christmas.

So mysterious.  Embroidered cover.  I added a loop to attach links for the stroller etc.

Embroidered cover.

This was my first attempt so there’s some things to iron out but I’m totally impressed with how it turned out!! Plus, in my opinion, the little things that make it imperfect are just fun details that come from a totally handmade gift crafted with love!  I added a loop to attach some links for the stroller etc.

Here’s a glimpse at what I put on each page.

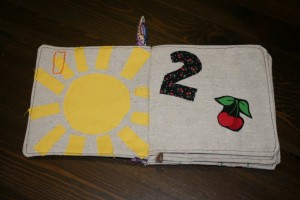
Page 1 and 2.

Page 1 and 2.

I only bought one thing and that was yellow thread so I could machine sew the sun.  Other than that, I made the entire project out of things I already had on hand, which I thought was pretty frugal and resourceful, but my husband said it means I have way to much stuff.

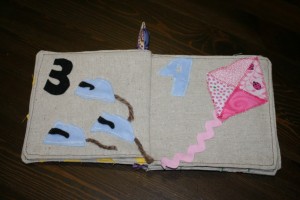
Pages 3 and 4.

Pages 3 and 4.

I started with 3 little mice and then realised how cute it would be to tie in some fairy tale reference, so there it is.  Their tails are yarn and freely flop around.  the tail on the kite is thick pink rick rack.  The mice and the number 4 are made out of super soft minky fabric.

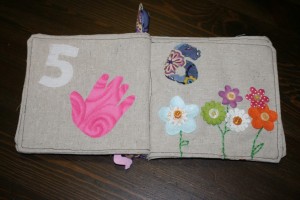
I fused the handprint on, cut from pink flannel.  The flowers are scrapbooking supplies, with button centers and embroidered stems.

Pages 5 and 6.

I used Steam a Seam and fused the handprint on, cut from pink flannel. The flowers are from my scrapbooking supplies, with button centres and embroidered stems.

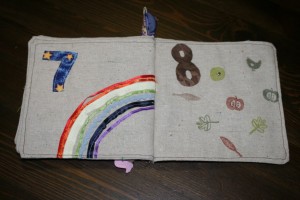
Pages 7 and 8.

Pages 7 and 8.

This page was a bit finicky.  I used ribbon, again what I had on hand, for the rainbow.  For my next book I think I’ll purchase thick ribbon for this page, it was a bit tricky to work with the thin ribbons.  However, the lumps and bumps here and there in the rainbow give it character!  I was a but stumped for page 8 and was going to use butterflies when I thought of stamping instead.  I was trying to vary the textures and colours in the book so this was a good opportunity to use something different.

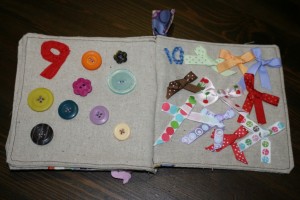
Pages 9 and 10.

Pages 9 and 10.

This is the super 3D double spread!  The buttons were a piece of cake.  The bows were a little more involved, tying them was one adventure and then sewing them on to make sure they weren’t going to undo was another!  I wish I had made the number 10 a little bit bigger but oh well.

Backcover with my label.

Backcover with my label.

My labels, which I finally got around to making, which I suppose is another post.  This book was great fun to make and I made it in a about 3 sessions at the machine, started Friday night done Sunday noonish.  Working on a tutorial to post soon.

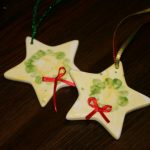
Christmas tree ornaments, made by my little men.

We made this ornaments for our tree.    I used to have only handmade ornaments, I would paint some every year, but we’ve decided to pick them up as souvenirs as well.  So now everything on the tree is meaningful in some way, it was a gift, or handmade, or bought in some exotic land!  I made these ones with the boys this year, they’re actually Crock-A-Doodle ornaments that I got crafty with. I dipped one of their fingers in the green paint and made a little circle with the fingerprints. After is was glazed and kilned I added a little satin ribbon bow and stuck it on with a glue dot for a cute little embellishment.

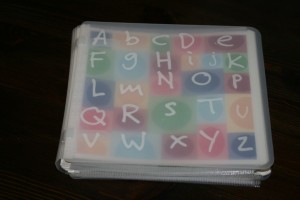
ABC book.

Just cleaned up my desk/craft area and found this hidden away in the corner. I was supposed to be adding some more pictures to it and putting it back together . . . . ages ago. Now there’s a 11 month old sibling to add to it!! But since it’s a papercraft, and I haven’t posted about any of those, I thought I should share.

ABC cover

ABC cover

I used a hinge bound 7 x 7 scrapbook, it was from Creative Memories ages ago so I doubt you can still get one. There are so many school themed books out there I’m sure one of those could work.

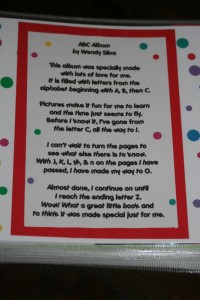
ABC poem

ABC poem

I found the little poem online, not sure where but you can download the document here. (as soon as my techie hubby helps me)

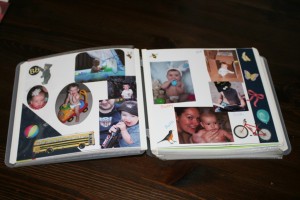
An easy letter to fill up, B.  Here's the 2 page spread.

An easy letter to fill up, B. Here's the 2 page spread.

I made each page a 2 page spread for the letter, except near the end I used 1 page for those less likely to fill up, like W, X, Y, Z. In hindsight I should have done that for Q as well, other than quilt I’ve been stuck on that one. I used a bunch of different coloured alphabet sticker sets, again from Creative Memories, but you could just by I sheet and use it for your entire book. I just had a lot of alphabet bits and pieces.

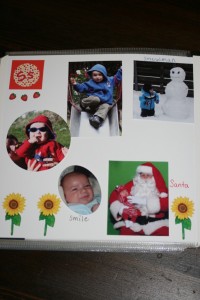
S is for sunglasses, smiles and snowmen!

S is for sunglasses, smiles and snowmen!

You can use scraps and bits of paper to decorate the pages. If you have punches it’s even easier.

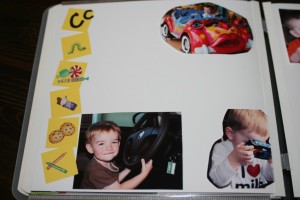
C is for cookie

C is for cookie

This is also a great way to make use of sticker odds and ends you have lying around. I also find it handy for using up photos I printed but didn’t scrapbook, I have a bad habit of overprinting. I also print a lot of wallet sized pictures for this project, since the pages are smaller and I can fit 9 of those photos on a sheet it works out well.

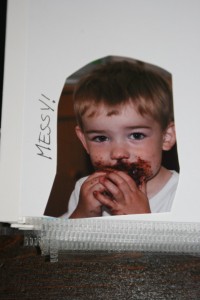
M is for messy

I started writing the words next to the pictures as well. Depending on your child you may want to add words.

Guess I’d better get updating!

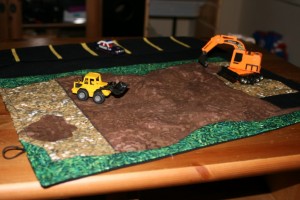
May I present my new invention – the Playcosie!

Looks like the car cosie you say? Ohhhhhh scroll down my friend.

Looks like the car cosie you say? Ohhhhhh scroll down my friend.

When I gave Wesley his car cosie he thought it was pretty cool.   However, he looked up at me after a few minutes and said, “Where’s the rest of the road?”.  So I thought of making him a playmat, he has mats with roads on them already, but I thought one from me would be neat.  Then today I noticed he had all construction vehicles parked on his cosie and thought I’d make him a construction site playmat instead.  I even have the perfect fabric (which is also part of my work in progress car cosie for Nate).

And so once again here I find myself creating from scratch.  Not using my grid paper this time, but I will jot down the measurements of what I’m doing and make a template later.  BUT I asked myself, why make it just a play mat? what about the vehicles? does he have to carry his car cosie as well?  So I had the idea to incorporate the car cosie pocket idea into a parking lot and then the vehicles are stored easily and the playmat could fold and roll up just like a larger version of the car cosie!!  I’m getting pretty brave for a ‘sometime’ sewer.  Here’s how I’m doing it.

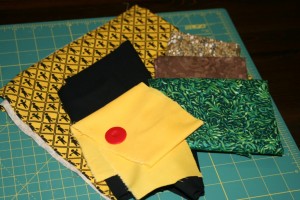
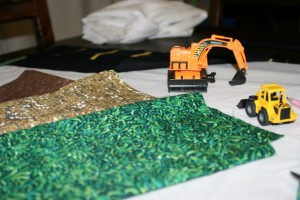
1. I have a construction themed fabric for the backing (18 x 22, from Walmart’s craft section), black for the road and parking lot, yellow for the lines, green for grass, brown for the dirt and a patterned stone print for here and there.  I may have to break out the Steam a Seam again for the appliqué, we’ll see.

Fabric selection

Fabric selection

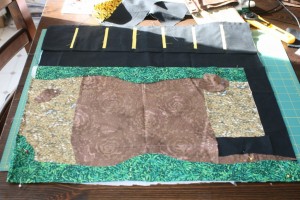
2.  I cut a piece of black fabric to be the pocket (10 x 22), fold in half and iron. I sewed it to piece of black fabric to be a road in front of the parking spaces ( 8 x 22, just because). I suppose you could just cut this all as one piece and press twice to be pockets and a road but I wasn’t being that logical. Attach the pocket piece to the road piece by sewing along the raw edges.

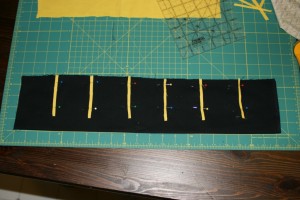
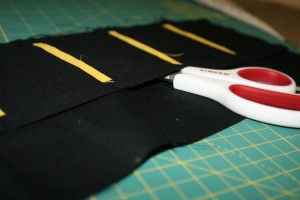
3. Pin it at about 3 inch intervals, leaving 1/4 for seams. This 3 inch part was a bit ‘ishy’, I eyeballed it after I didn’t like the 3 inch spaces. Sew along those lines over the edge of the fold a little bit. One tutorial I read said to be sure to backstitch as those pockets are going to get a lot of use from little hands.Then I got out my new love, Steam a Seam and cut out little yellow lines which I ironed on over the pocket stitching. I recommend not sliding the iron around the fabric but rather use a lift and press technique as those little yellow lines might jump onto your iron and get all sticky and messy. Just saying, it could happen.

Parking lot in progress

Parking lot in progress

Voila, a pocket.

Voila, a pocket.

4. Decide how big you want your construction site.  If you attach the pocket piece at the edge of your outside material your mat will be around 18 x 22 inches total.  Depending on your needs and the child that might be big enough.  OR if you want more play for your buck you can slide the parking lot up a bit, cut a ‘filler’ piece of fabric for the outside, some nice co-ordinating print perhaps and have a bigger mat.  I had a scrap of black so I added a couple of inches to mine, making is almost square, 21 1/2 x 22.

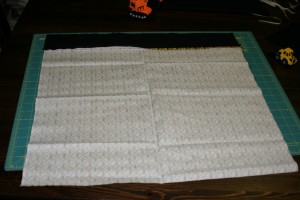
Wrong side with strip I added for more space.

Wrong side with strip I added for more space.

5.   Now it’s time to get wild and crazy!  I didn’t want to use interfacing but wanted to add some weight to the project, so I cut a piece of white lining to fit the entire area.  Then I marked off where my pocket/road section would end.  Then it’s time for a bit of freestyling to fill up the construction site!  Lots of mud?  dirt? a puddle of water? some grass? pile of wood? pilons? whatever!  Fill  up the remaining space either quilt style or appliqué with scraps or prints picked special for this purpose.

Decisions, decisions.

Decisions, decisions.

Rough plan (sorry for the sun)

Rough plan (sorry for the sun)

6. Once you have that all worked out sew it to the lining. First I went all around the perimetre with a straight stitch. Then I used a zigzag stitch and just went around everything with black thread. I figured it’s a construction site it can look a bit rough. I also hope it stops fraying and secures the pieces down from my 2 little munchkins.

Look close for zig zags.  Wesley was waiting at the machine and ran off with this to play.  So no detail picture.

Look close for zig zags. Wesley was waiting at the machine and ran off with this to play. So no detail picture.

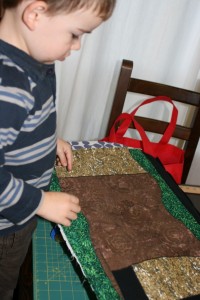
7. Now we got my trusty friend Steam a Seam out again and placed some mud puddles here and there. This part was fun because Wesley could help me do it and it can hide any stitching or spaces you just don’t want anyone to see.

Wesley wanted to put them all in the big mud area in the middle.  I stiffled his creativity and moved them around a bit to where I wanted them.

Wesley wanted to put them all in the big mud area in the middle. I stifled his creativity and moved them around a bit to where I wanted them.

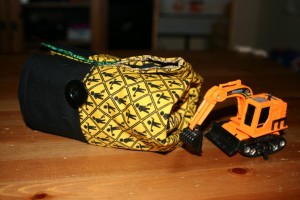
8.  Now put things right side together, sew all around, remember to place an elastic for the button and leave an opening to turn. I put the elastic loop in and sewed all around leaving the space across from the loop open to turn. Then I came upstairs and put some cars and trucks into the parking spots, rolled it up and got a feel for where a button should go. Then I reached into the hole and attached the button.

10.  Time for some top stitching fun!!  Turn the project right side out and press to get a nice crisp fold. Top stitch all around the edges of the project.  If you’re a quilter you can even get fancy and do some stitching around the playmat (not on the parking lot!).

I'm sure I have these all set up wrong, Wesley will fix it in the morning.

I'm sure I have these all set up wrong, Wesley will fix it in the morning.

11. Ta da!

All rolled up and ready to go!

All rolled up and ready to go!

Things I learned:

– I should make my patterns and do my thinking during the day so I just have to follow steps at night when the kids are in bed and I try to sew.

– Lots of black scraps, left over from mistakes, isn’t so bad.  It can be parking lots on some other playmat.

– Having yellow thread on hand would have saved me a step.

– I need a bigger cutting mat.

– Don’t tell your child what you’re doing when making them something cool they will really like. It makes things go slower.

Spontaneous craft.

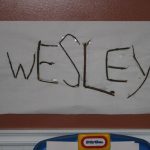
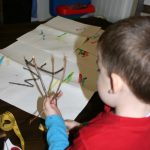
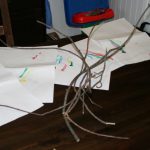
I really enjoy reading the Frugal Family Fun Blog, I’ve come up with similar ideas for either my classroom or my kids.  One day we were out somewhere and our son was getting restless.  I grabbed a stick and started to form it into letters for him to guess.  We made a W for Wesley and some other letters I knew he would recognize.    Today, after playing in the yard for a while he came running to the door to tell me he found letters.  He had a pile of sticks and was excitedly telling me all the letter he had found.