Category Archives: DIY

DIY fabric covered wooden brooch

One of my goals is to accessorize more and while I have bought a few things here and there I figured I should also make my own pretty things.

You will need:
– a scrap of fabric
– a wooden cut out
– glue gun
– pin back
– scissors
– Modge Podge or white glue

Trace your wood shape on the wrong side of your fabric. If you have a special part of the pattern you want to capture make sure you’ve placed it in the right place.

Spread Modge Podge on the wooden piece. Cut out the fabric and place it on.

Plug in your glue gun and add your pin back with a little blob of hot glue. You may need to trim excess fabric from places with small scissors or an exacto knife.

Next have someone around to take a finished photo for you because propping a camera up on items and hoping for a good shot is very hit and miss.

You get the idea.

Friday Create Along

Ok I’m not entirely caught on on previous projects. I’ve still got my slippers to crochet and my little sewing thread/scrap catcher thing to make but I did get to this lovely embroidery. And I’m sure glad I did.

I did some things differently, mostly because I was sickly on the couch and didn’t want to get up for anymore colours or to Google a certain stitch . . . I mean I took some artistic license.

I was pumped to try the whipped backstitch but my outer circle ended up a tad wonky so I decided to go around another time in an effort to even it out. Thanks to Nicole for having such an awesomely cute pattern. I proudly showed my hubby “Look!” and he looked and said “What is it?” and even as I started to answer I realized how silly it was sounding in guy speak, “It’s a hedgehog! In a tea cup! Floating . . in the water . . . nevermind.”

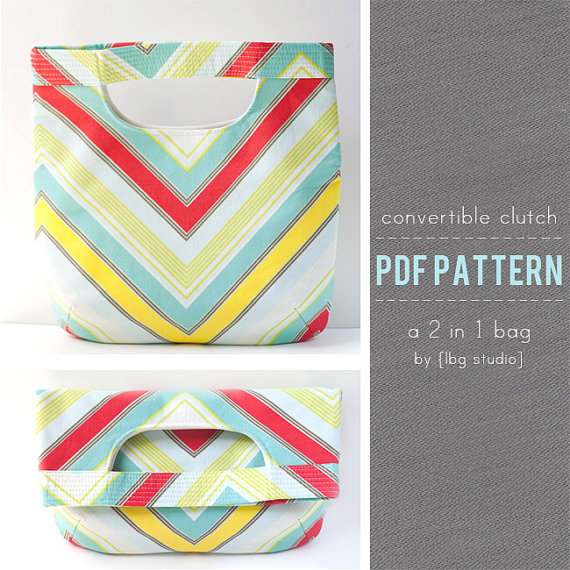
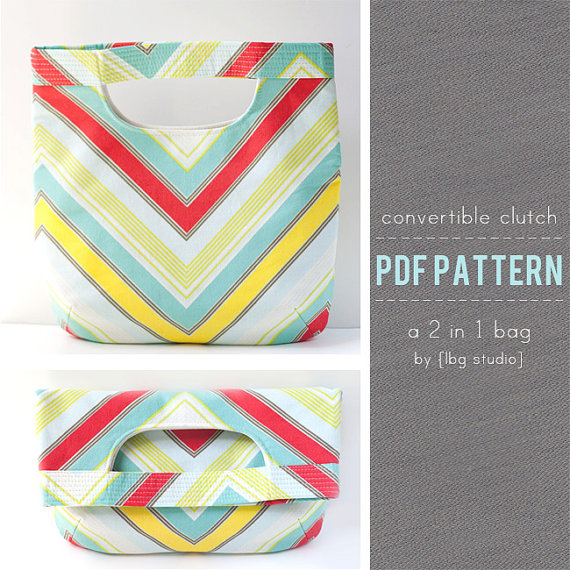
So onto this week’s project, the convertable clutch! The PDF pattern is available here on Etsy or here directly from the LBG site. And of course I do have 1 to give away. The lucky winner is . . . .

Ellen!!! (email sent!)

So congrats and I hope you have time this week to get sewing!

Wanna make a clutch/tote?

A while ago I purchased this great pattern and once again, I have permission to share. Coincidentally Vanessa also won a spot in my January ad giveaway and so her cute little button is over there ->

This will be my Friday Create Along project and to let at least one person play along with me I will give away the PDF pattern to one lucky winner on Friday. So leave your name here and I’ll announce a winner on Friday when I reveal my late assignments for my past Create Alongs and put up the details for this one.

Guest post!

Hello everyone, well hopefully I’m enjoying some great weather in Belize, maybe I’m even on a beach! Which is why I asked Janee of Yellow Bird Yellow Beard to guest post for me. Here’s her cute DIY.

Hi Fun People!

I’ve seen these adorable little figurines floating around the internet recently, I’m sure quite a few of you have seen them also. Now I’m normally not a huge fan of glitter, but these are simply irresistible. Enjoy!!!

DISCLAIMER::: I’m going to say this just in case you’ve been living in a cave up until now and have never worked with glitter before. Your going to want to do this on an easily cleanable or throw-away-able surface. Or better yet, outside. Or even better still, outside on a throw-away-able surface.


xoxo
Janee

DIY gift tags or mini cards

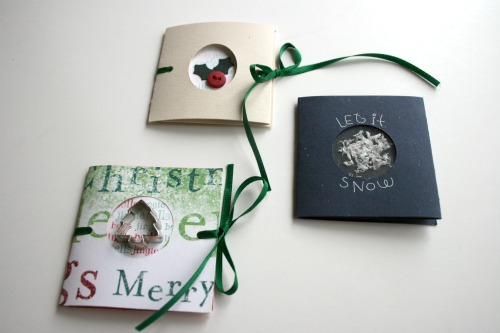
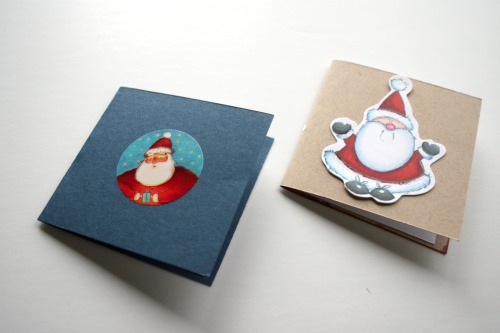
Wow, feels like it’s been forever since I’ve done a DIY so here one is! I’m going to show you how to make these great little gift tags, an easy way and an up-a-notch way. I shared these last week over at Celeste’s blog and now I’m sharing it here! These ones are holiday themed but it would be really easy to change some colours and stickers and use them on birthday gifts or for another occasion.
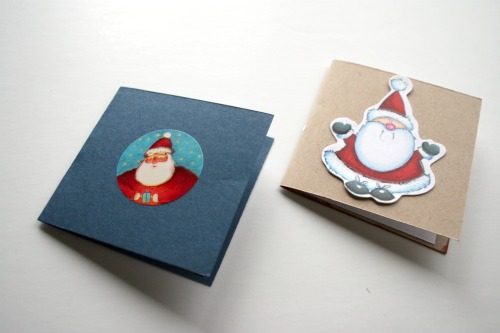
You will need – cardstock (colours and some white), stapler, paper cutter/scissors, adhesive
Optional fun goodies – ribbon, stamps, stickers, embellishments, ink or markers

Cut the coloured papers in 2 1/2 x 7 1/4 inch strips. The white papers should be 2 1/2 x 5.

Fold the white pieces in half, these will make the inside ‘pages’ of the card.

Fold the coloured paper at 2 1/2 and 5 inches. The remaining section will be slightly less than 2 1/2 inches in width. Using scissors or a punch make a cut out in the middle of the card.

Next grab one of the white scraps and decorate it in some fun way. I chose to use a snowflake stamp and my markers. I used the snowflake to create a patterned paper.

Then place adhesive around the opening for the stamped white piece to stick on. Keep the adhesive over to the one side so it doesn’t peek out later.

Then add some more adhesive on the back of the white paper and fold the last bit over to hide it all.

Place the white piece inside the card and add a staple.

Now turn the card over and add the embellishment on the outside. Voila!

Depending on the supplies you want to get your cards can get really fancypants. The holly one was made with a button and leaves from a scrapbooking punch. The snow flake one has 2 pieces of an overhead sheet with some fake snow stuff I got at the dollar store inside.

Or you can also just put some stickers or cut outs on the outside.
Productive procrastination

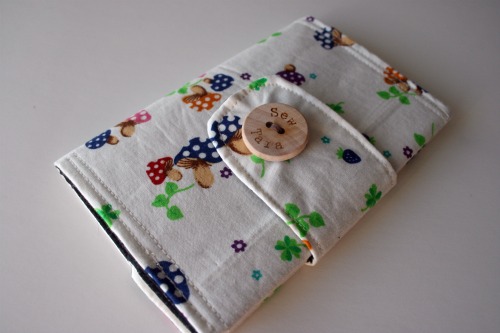
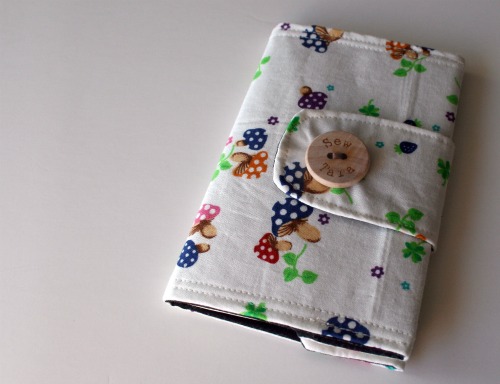
The other night while I was avoiding some of the things I really should have been doing I decided to sew this little guy up. It’s one of Keyka Lou‘s free tutorials. I know I go on about her patterns a lot but I’m totally smitten with them and they’re fun, easy and lovely!

Here’s my Moleskine cover, it’s full of mushroomy goodness.

I even made use of one of my SewTara buttons for the first time. Just in case anyone isn’t sure who’s ideas are inside the little notebook in my purse, now they’ll know!

Get your own personalized buttons here.

I’d like to call this post ‘what it is vs what I use it for’

Way back I made an eye pillow. It’s all full of flax seed and some nice smelly lavender. I thought I might use it here and there on my eyes, that’s what people do right? Savour the smell, relax and have some quiet thoughts.

What do I actually use it for?

I put my iPhone on it at night so that when it vibrates with email or a text or an early morning phone call it doesn’t sound like a jackhammer on my night stand.

Now what I intended it to be but hey, at least it’s getting used on a daily basis!

Camera strap reveal.

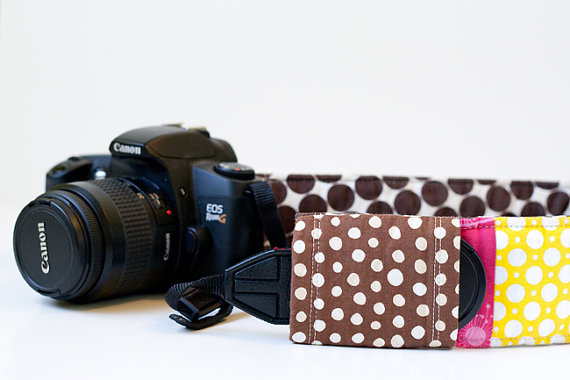
Finished my camera strap, once again my sew-a-long project was finished on a Thursday night. Photos taken today, yeah I live on the edge. I’m also a bit of a dork since I put the strap on my camera and it was all pretty then realized it was going to be tricky to take the photos. Yeah, I’m rocking the brain power lately folks.

If you’ve created along with me lbg also has a Flickr group for sharing things made from her tutorials and patterns. I promise her convertible tote will be in this feature some day soon.

I used my new dying of cuteness fabric, had a hard time cutting into it but hey what else is it for? I paired it with some scraps I have kicking around.

I didn’t have fusible fleece so I just used some scrap fleece i had lying around instead. It feels pretty puffy but I’m not sure that’s the way it should be.

Next challenge a boxy pouch! Perhaps you’ve made one of these, perhaps not. I haven’t and I’ve wanted to for a while. Now that I’ve got zippers and flat pouch making down I’m ready for this twist.

I found 2 tutorials that seem like they’ll work, these first two are lined and the first one will be seamless and the other will have seams on the inside (which means no tricky turning), this one isn’t lined at all and might be good for a thicker fabric. So choose your weapon and come play along!

The neglected ‘future posts’ folder. Plus a photography DIY.

Ages ago, when I didn’t blog so regularly, I made this folder called future posts and stuck some images in it. Today I browsed it and found some things I can share on days like this when I’ve been so busy the crafting has been slim. This one is fitting though considering how much darkness is surrounding me now in my lovely moving-into-winter home of Canada. A trick for shooting photos.

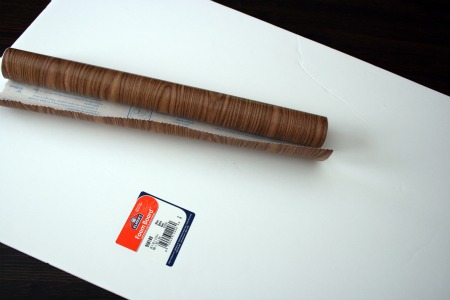
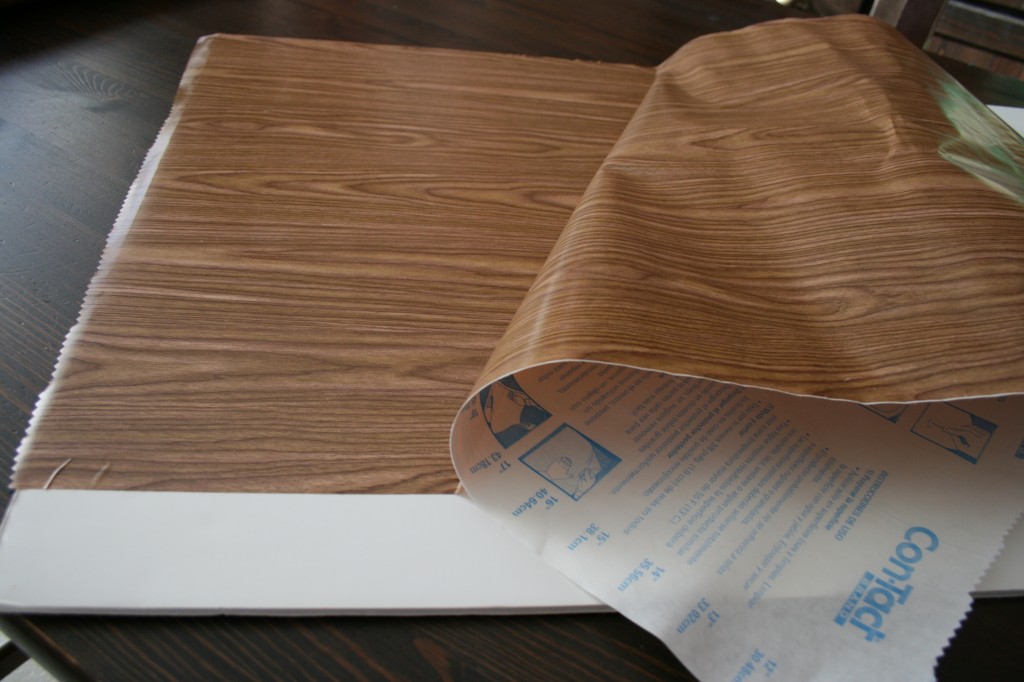
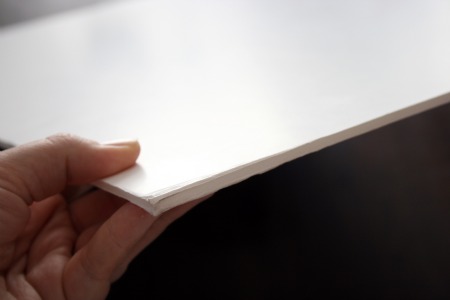
Get a white piece of foam board. This is what I was using to shoot all my photos but here and there I want a different background so I picked up some contact paper.

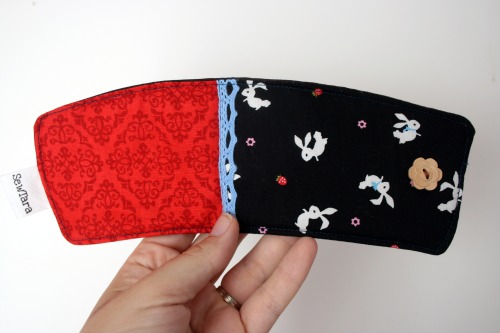
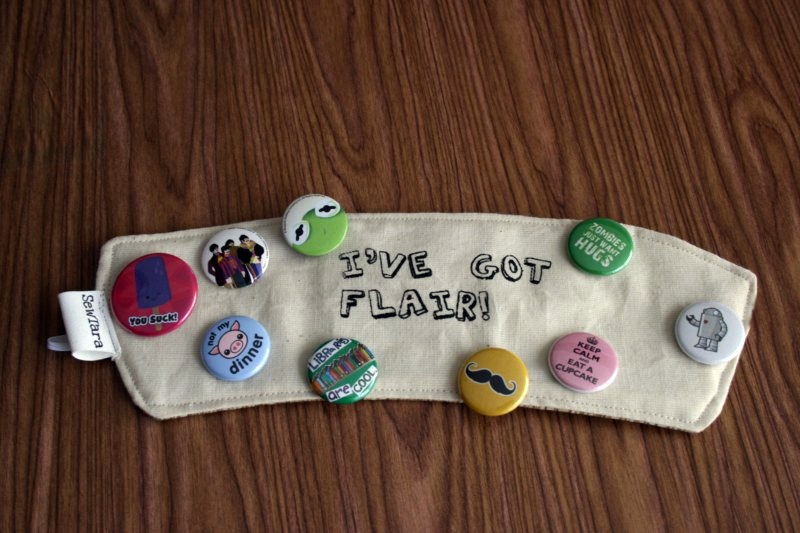
Foamboard is nice and light and I just stick it behind the buffet thingie in our kitchen and pull it out to wander over to the sliding glass doors to get the most light. I usually prop it on some chairs if I’m laying it flat to shoot, or lean it against the wall and a chair while I hold up a cup and cozy. Whatever works.

Then I just use one side.

Or the other.

I think I’ll have to make a new board with some of my vintage contact paper . . .ohhhh ideas, ideas.

Done and next!

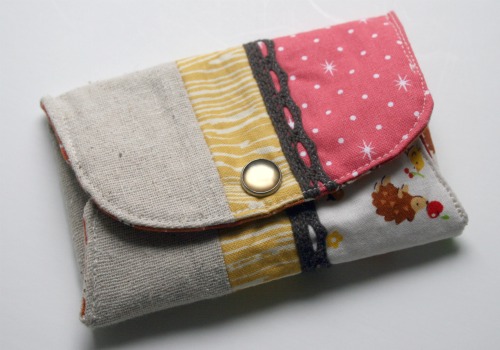
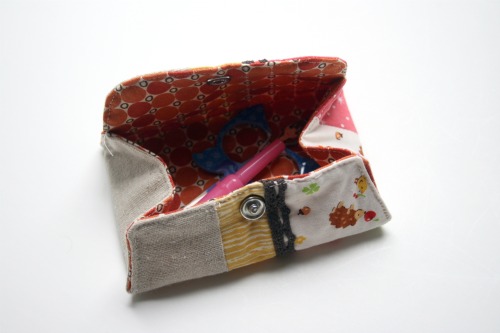
So I finished my lovely little sewing kit thingie, thanks to Rashida’s tutorial.

Some things were confirmed with this little project.
1. I deviate from patterns, constantly
2. Taking photos in natural light is getting impossible this time of year.
3. Now that my work days have shifted, working all day Thursday is really cutting into this feature.
4. Me and snaps don’t get along.

I cheated and used my machine to sew up the sides, I was too tired and short on time to hand stitch it.
I also wish I’d used my cute Japanese fabric where the pink fabric is instead. That too tired thing got in the way of thinking clearly I think.

For my next trick I’m going to make this camera strap from lgb. Not only does it use up scraps and make your camera look fun it’s got a little pocket for your lens cap which I sooo need.

Join me if you like, your assignement is due next Friday. If you’re too busy, lazy, uncrafty, or tired to whip one up you can just click and order one here.

Sharing links if you’ve played along, or sewn on in the past, on Fridays is always welcome! Or you can add to the currently pretty empty Flickr group I created.