Of course, like most projects, I’ve been meaning to get to this one for a while. I finally managed to squeeze it in this weekend.
I wanted to make the kids some bags to collect all their candy in that they could use for a few years. I find most things out there are cheaply made or too big for their 4 and almost 2 year old hands. Soooo off to the cutting board I went.
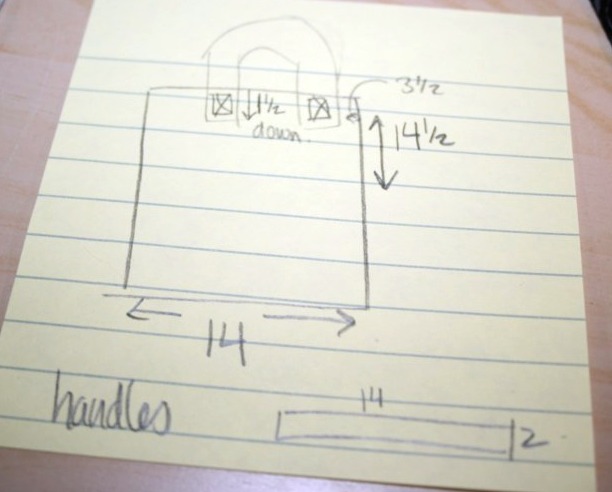
Here’s my high tech diagram. I really need to learn some sort of graphics program . . .
Measurements are in inches. That’s the handle placement I used, seems to be fine.
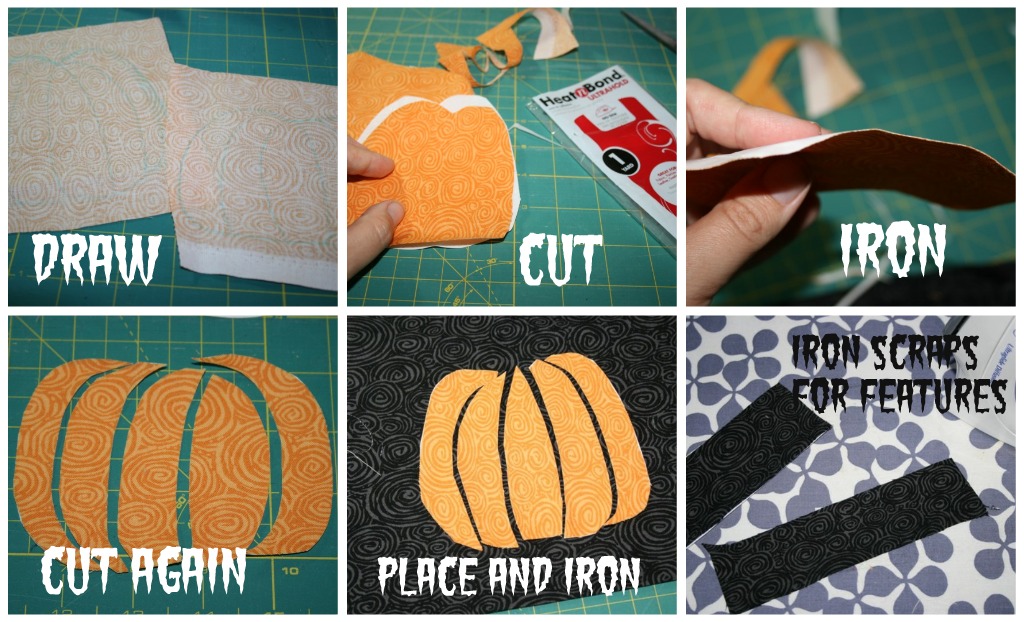
I used washable marker to sketch out some pumpkin shapes. I just free handed it but you could search for images or choose another design all together. Cut them out and fuse them to a new sew adhesive, like Heat and Bond. I wanted the black lines to show through on my pumpkin so I cut it up into a little puzzle and pieced it together on the front of the bag. Then ironed it on. I used some scraps of black and fused them to the Heat and Bond and then cut out some features. Guess I was on a roll because I don’t have pictures of that step!
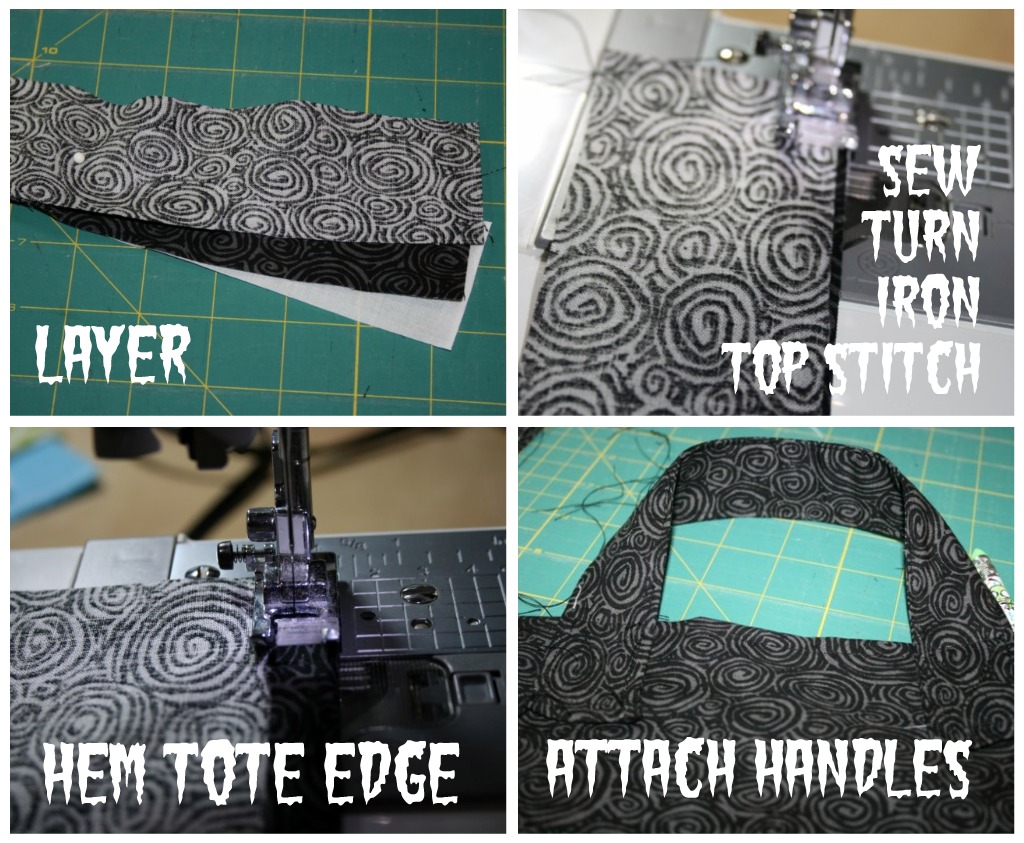
Layer your handle pieces together, I added some interfacing for some more stability. Sew down both sides and turn them right side out. That part is tricky, I found a chop stick helped. Iron them flat to get nice crisp edges and then top stitch all the way around turning the rough edges under. Hem the top edge of the tote, seam size isn’t really all that important just use the same mesaurement for the front and back. Finally attach the handles with a fun box stitch.
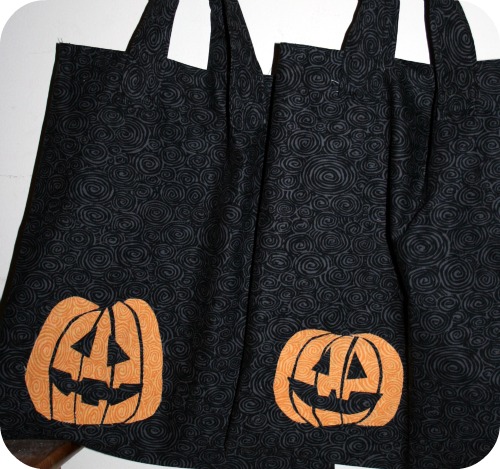
Lastly lay your front and back pieces right sides together and sew around the sides and bottom. I debated boxing the corners on my totes but decided not to, go ahead if you want. Turn the whole thing right side out and ta da, fun Trick or Treating tote!


3 Responses to Got some spare time this week? I’ll show you how to make some Trick or Treat bags.